AirMax AC Radio GUI
Main Splash Page
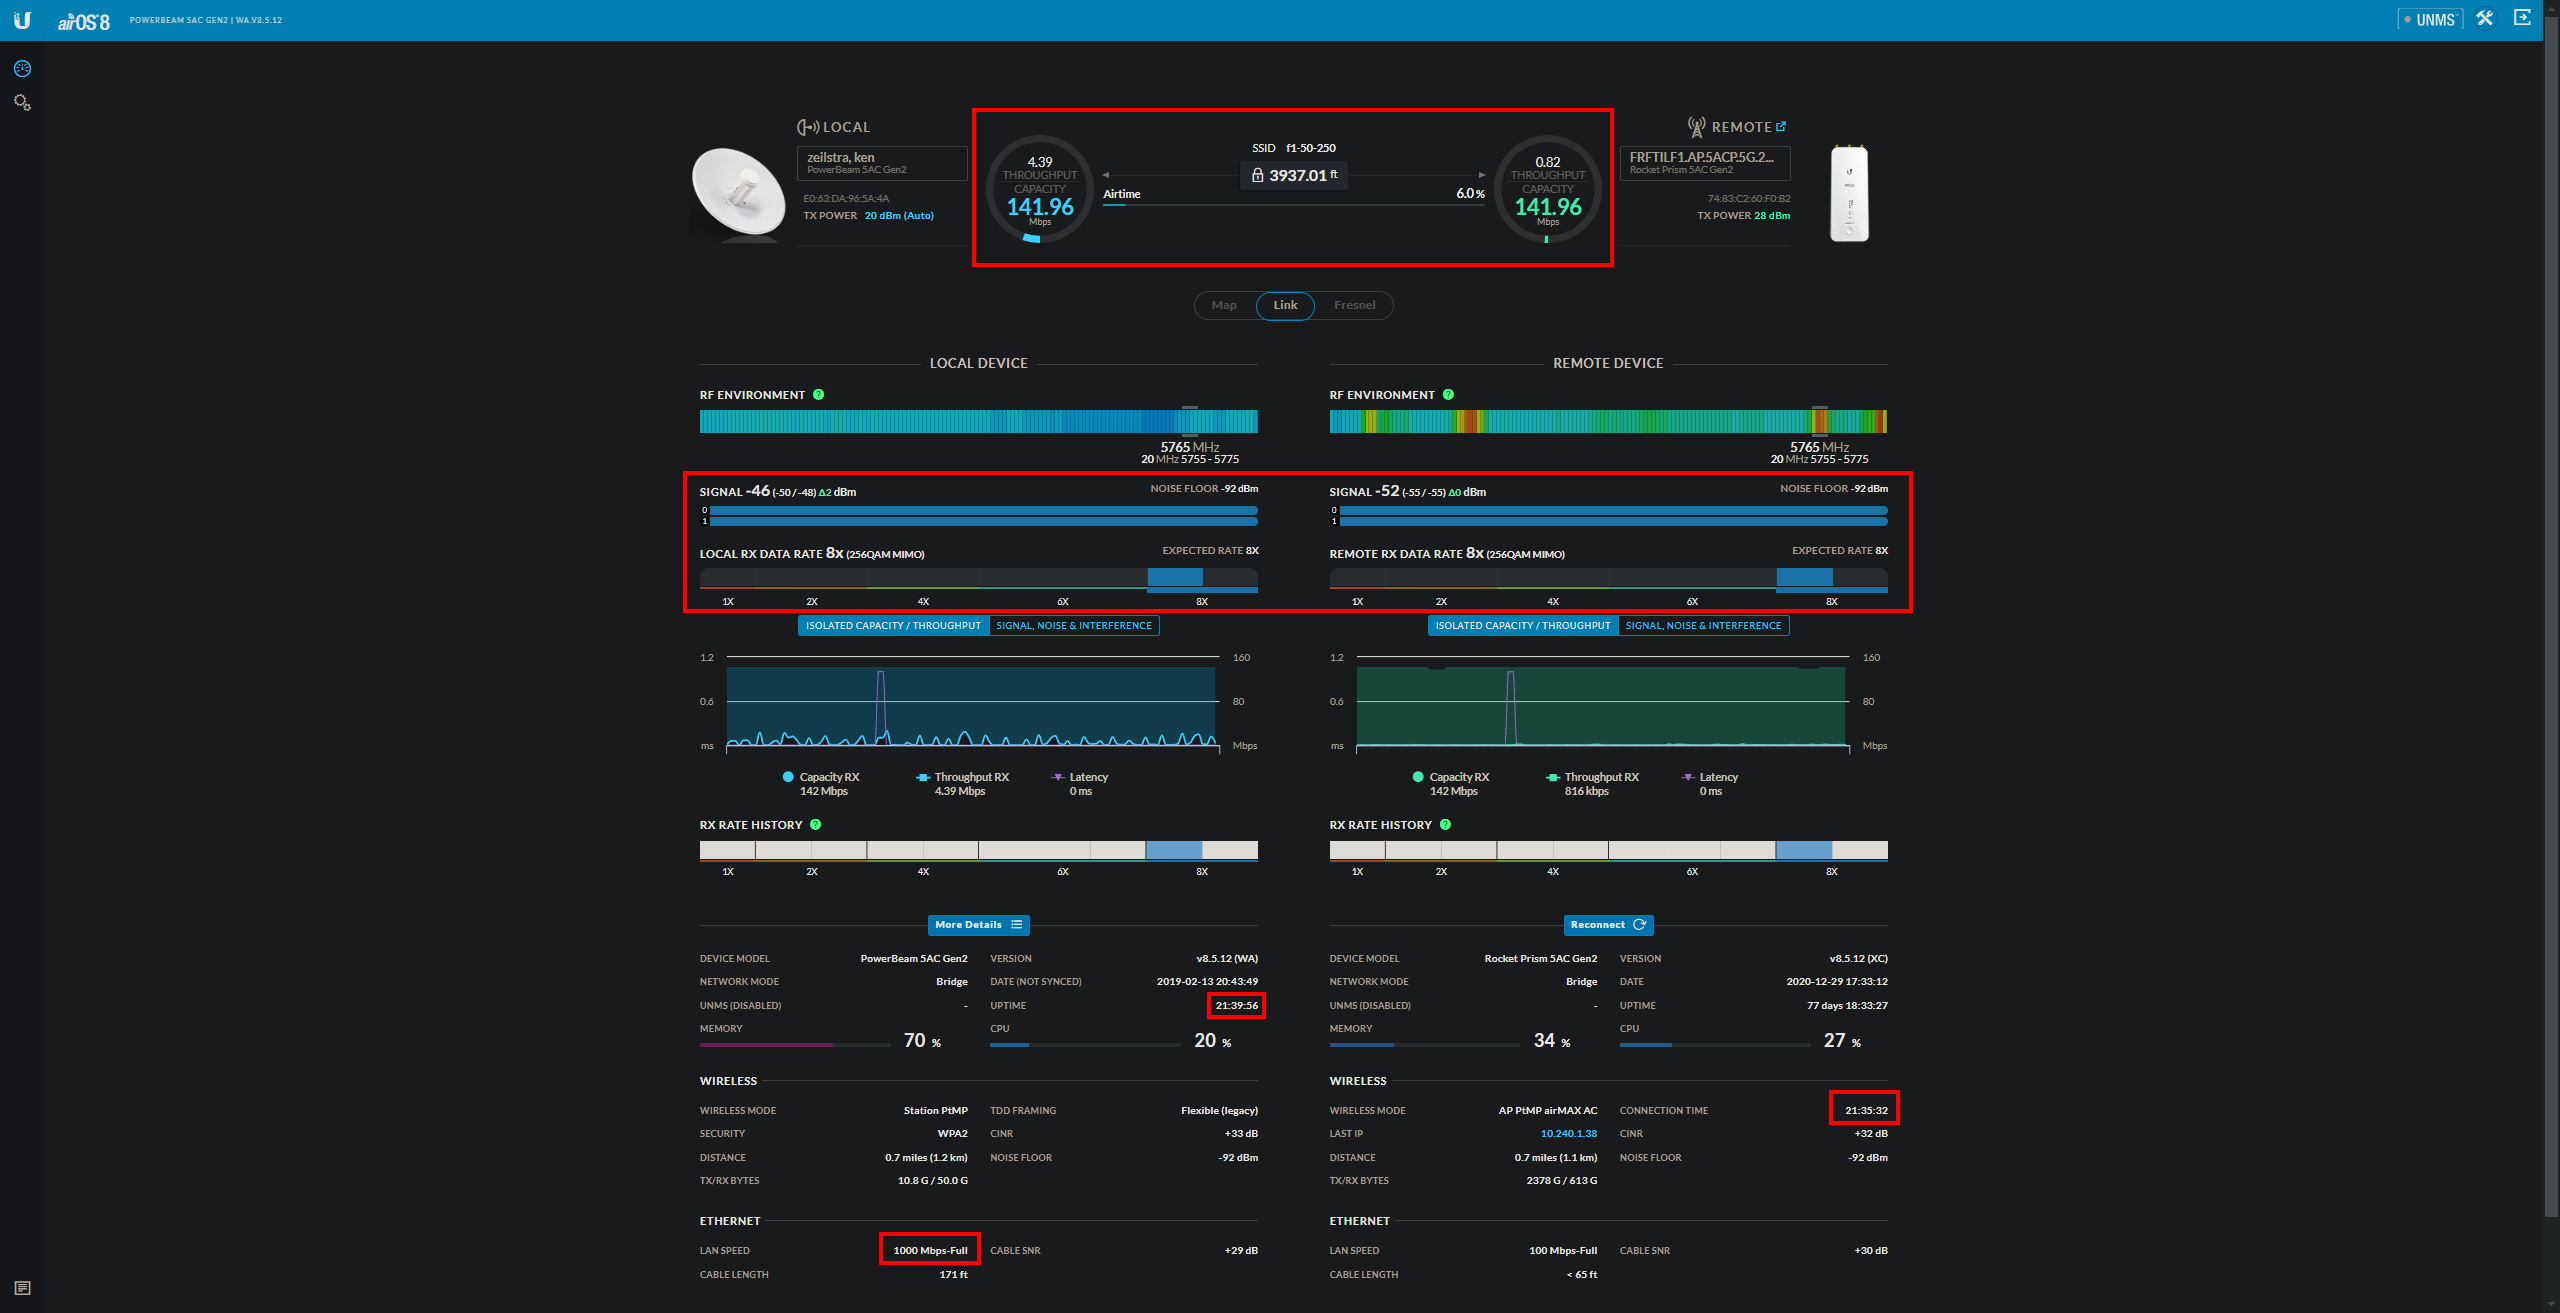
After logging into a Ubiquiti AirMax AC radio, this is the main splash page. Some relevant information on the page would be the radio’s uplink and downlink capacity. For this radio, their capacity is a symmetrical 141mbps. Some other pertinent information would be the radio’s signal, chains, modulation rate, and LAN speed. Some less relevant but still important information would be the radio’s uptime and connection time. A big difference between the two would point to the radio losing connection wirelessly.
Device Log
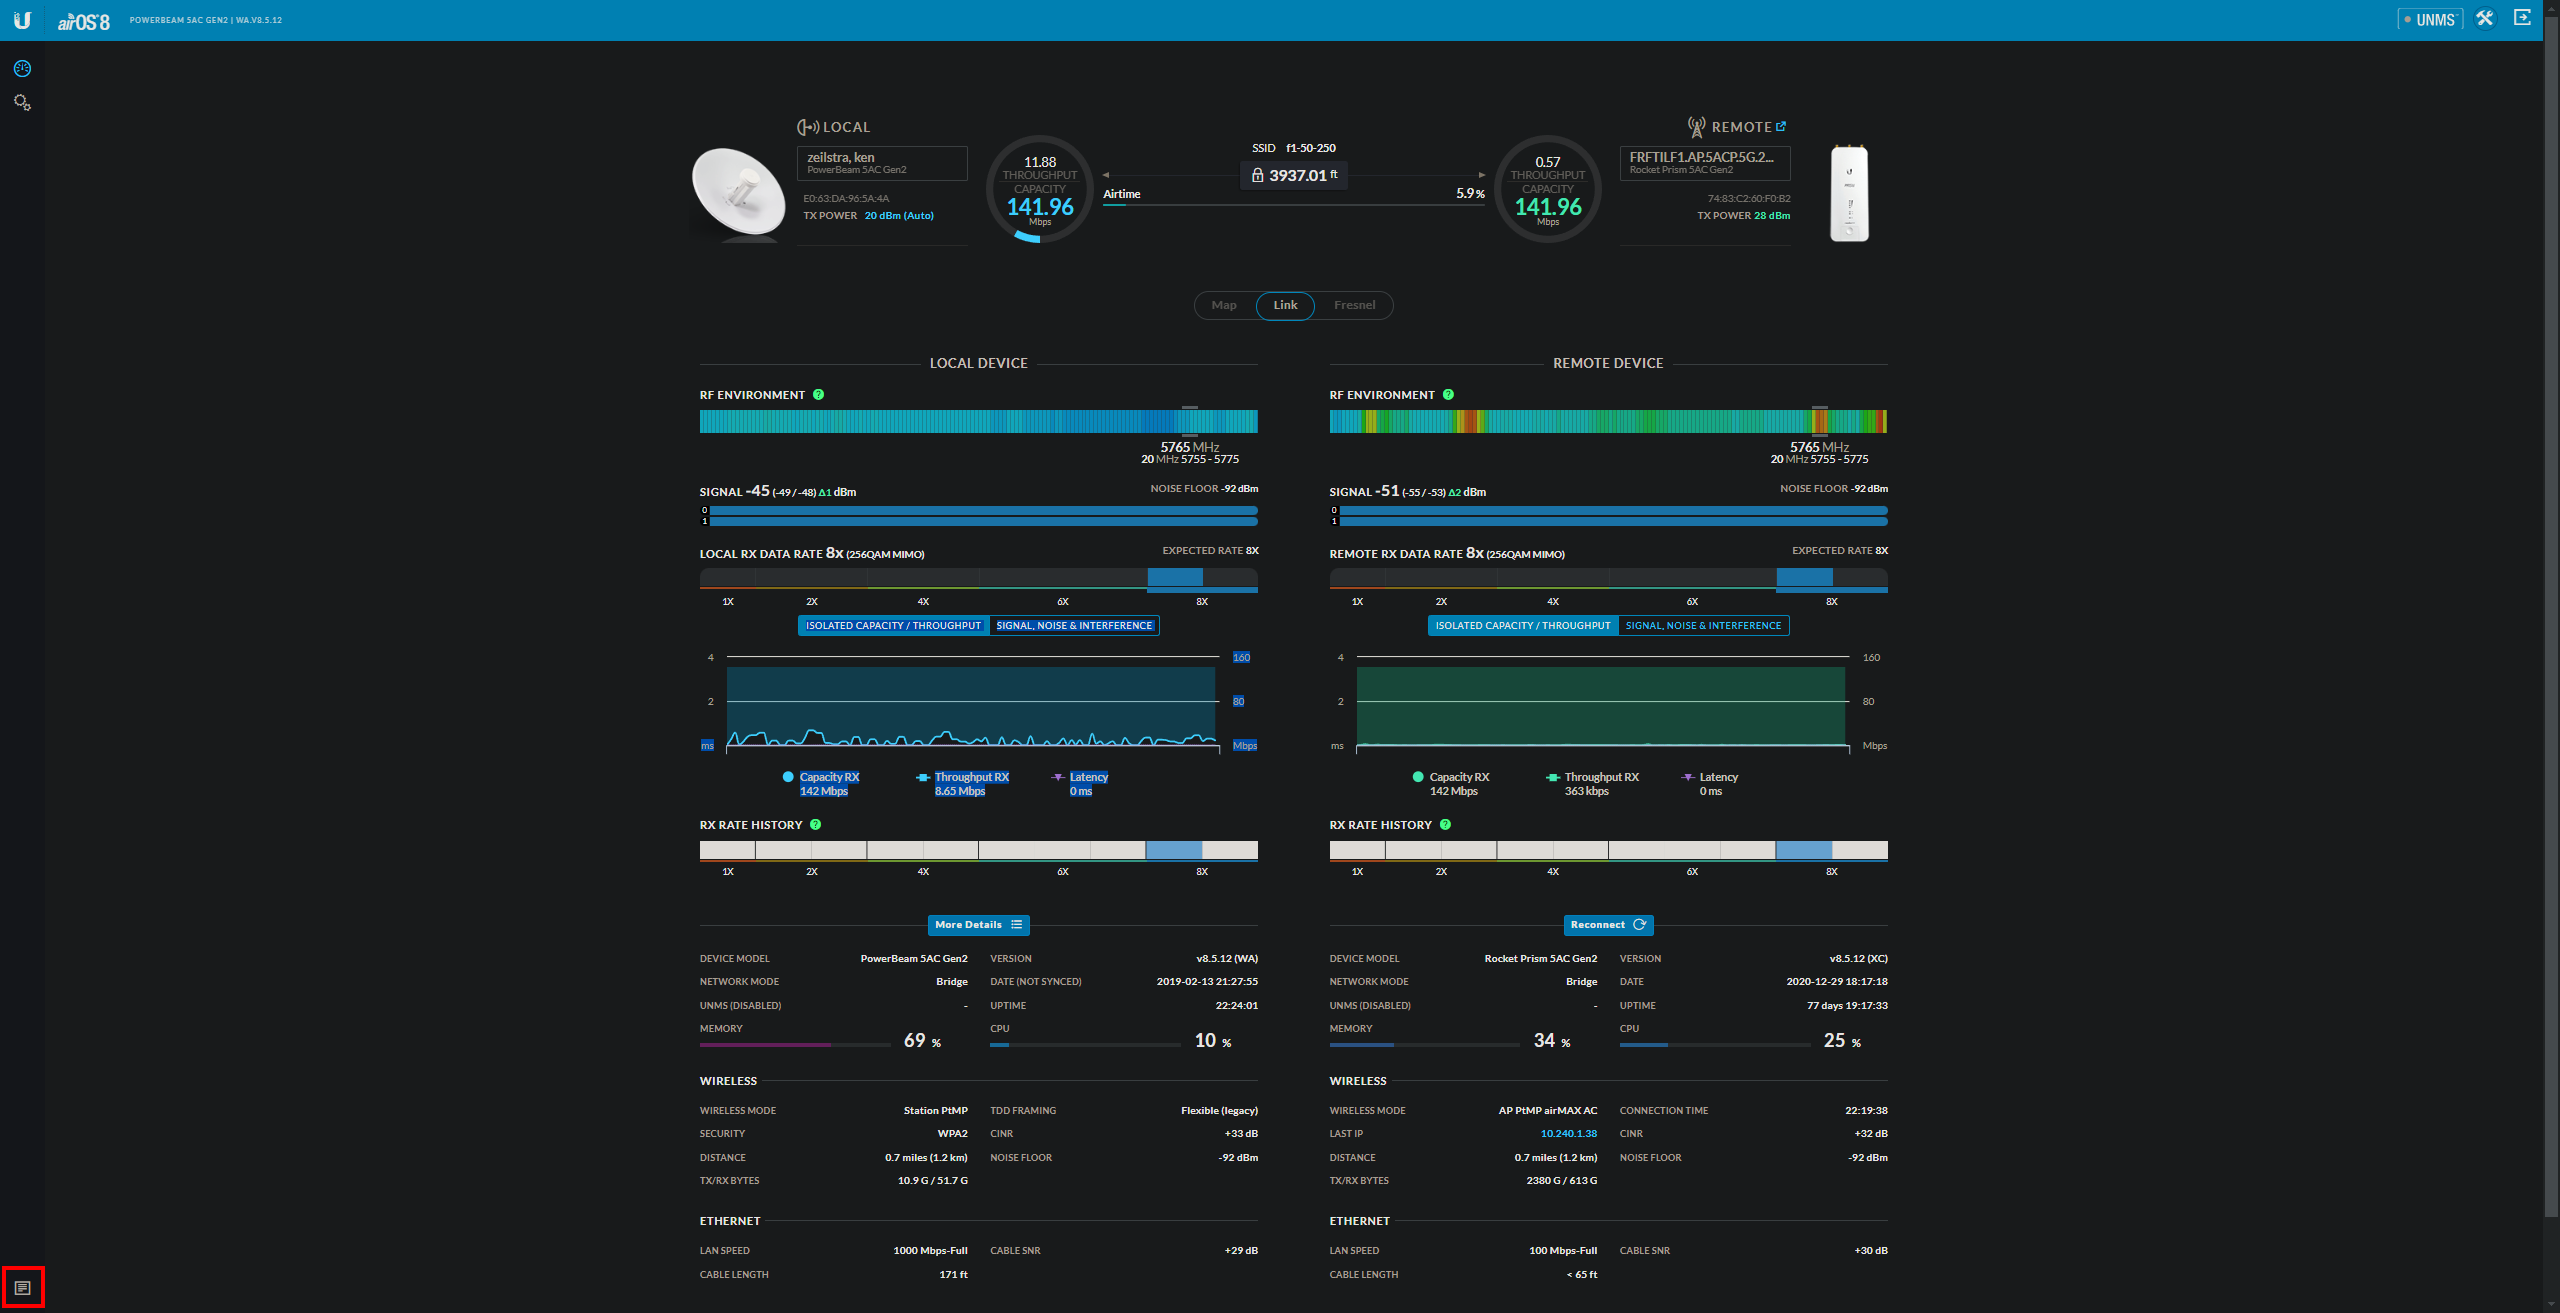
Bottom left of the main splash page you will find the device log. Here is where the operation of the radio will be logged since boot. This is the only place to check for an intermittent LAN connection. Keep in mind when troubleshooting that the log will clear on reboot so it’s a good idea to give it a look beforehand.

Customer Router/Lan MAC
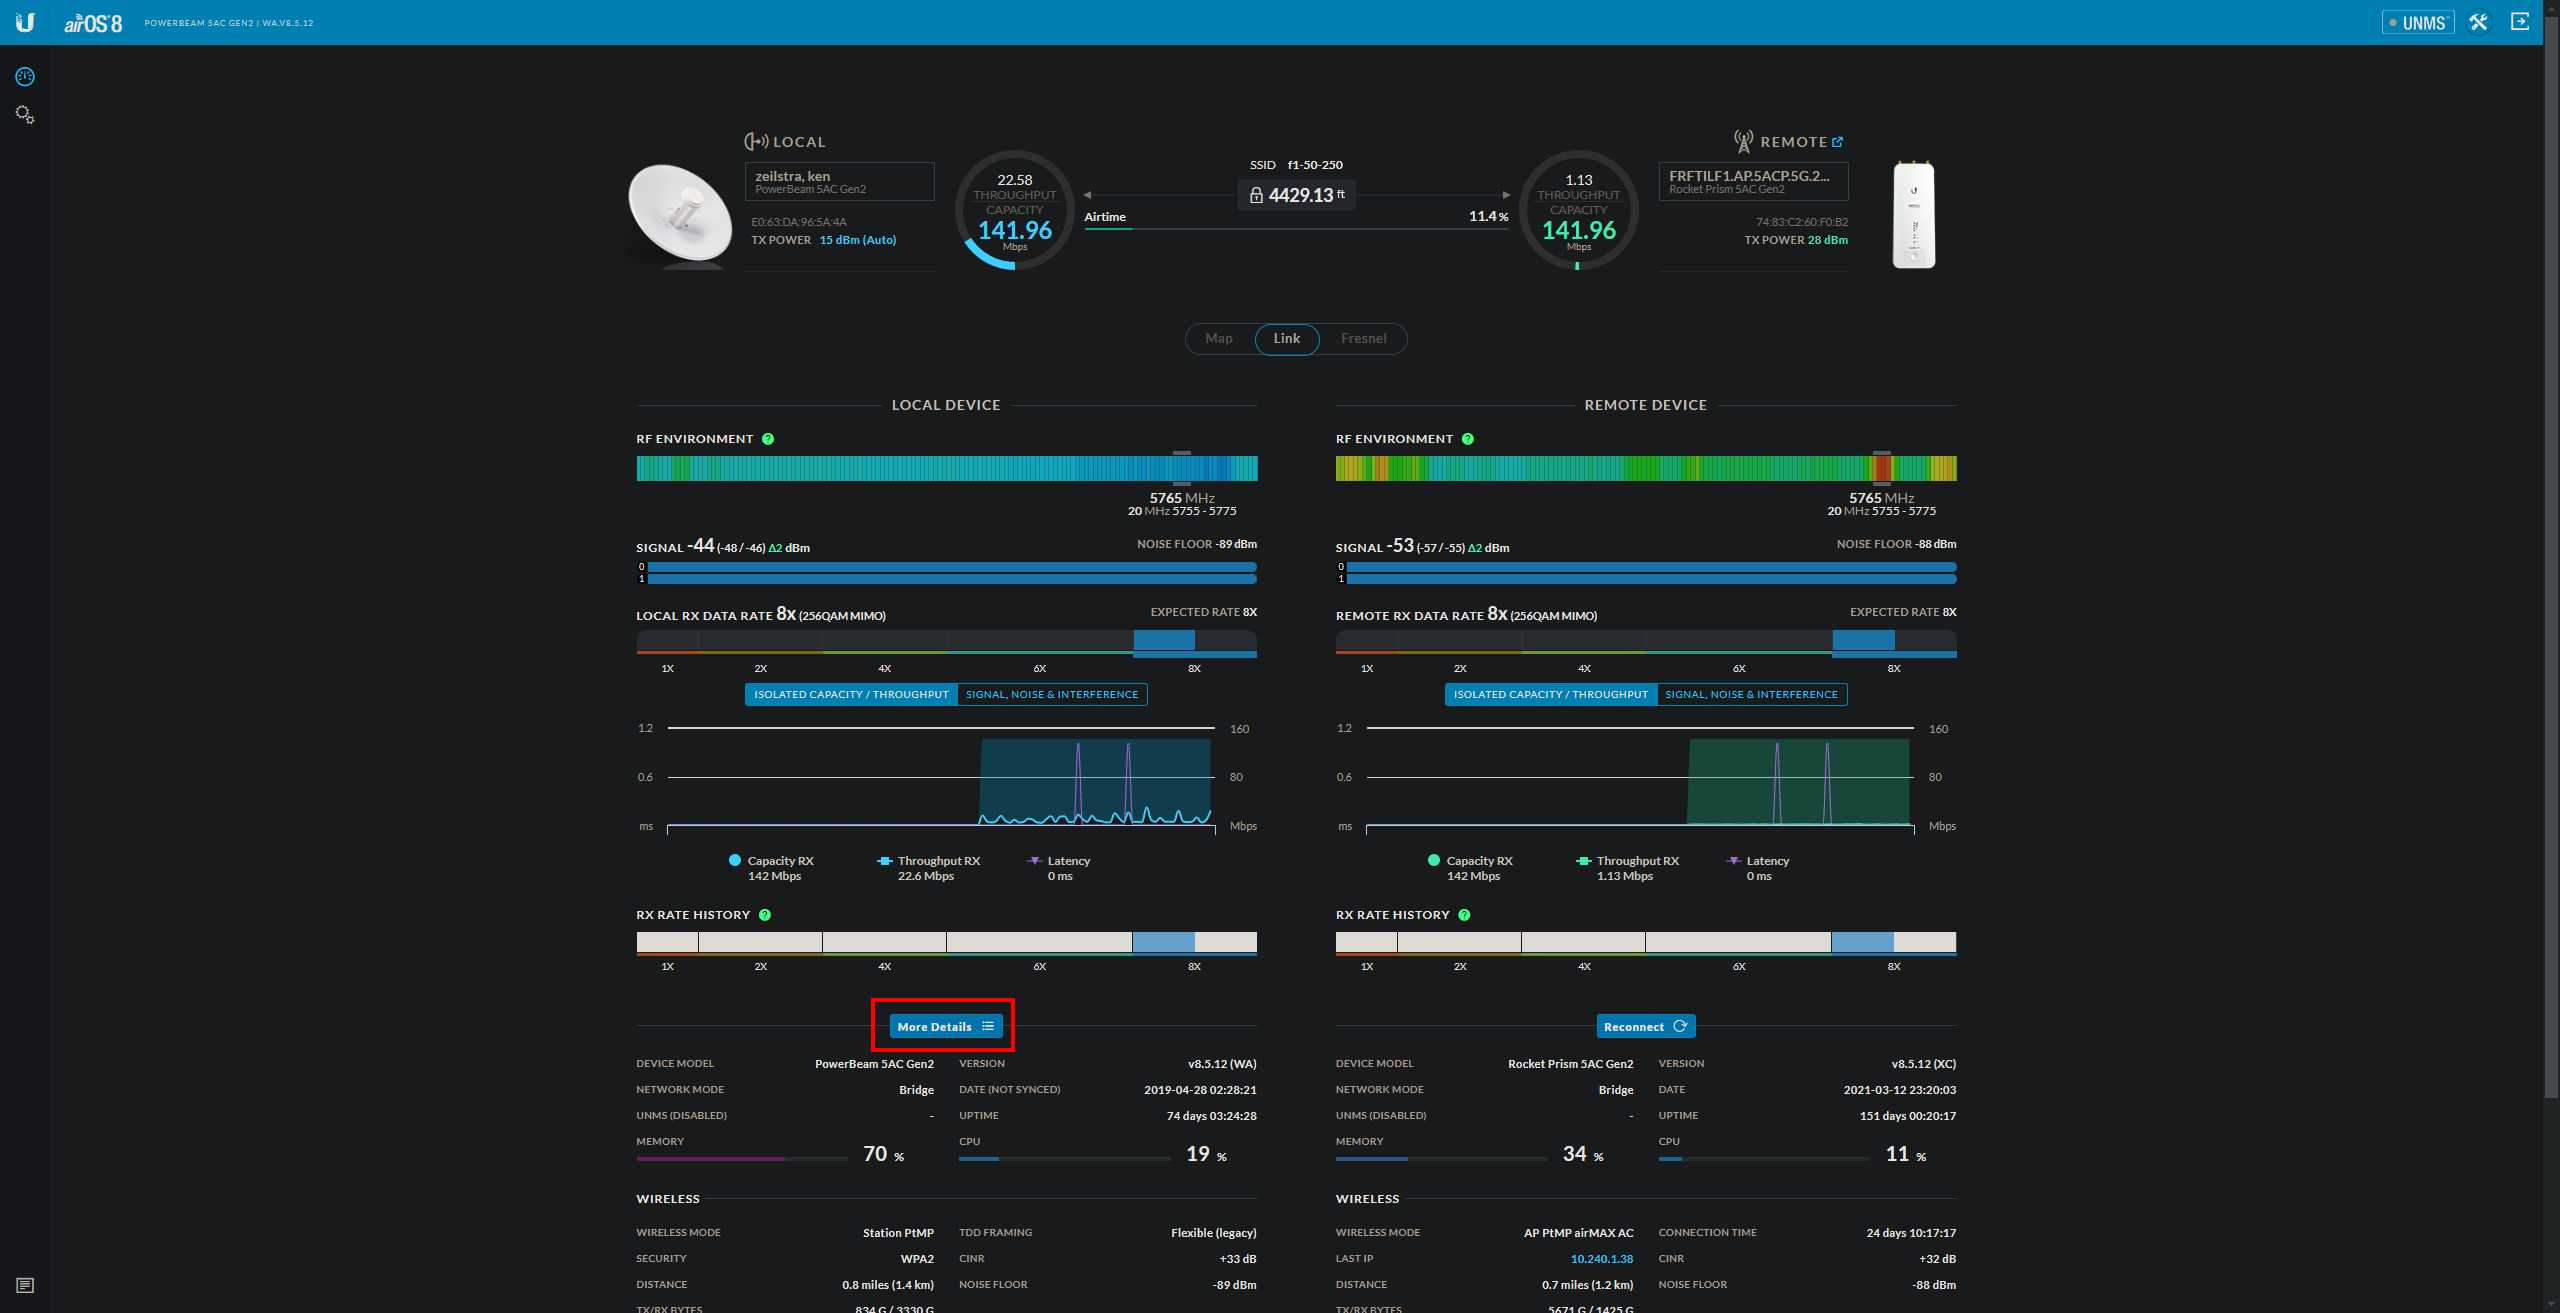
Under the customer’s radio side of the GUI, you should find “More Details”. This is where you would find a customer lan0 MAC address for their router.
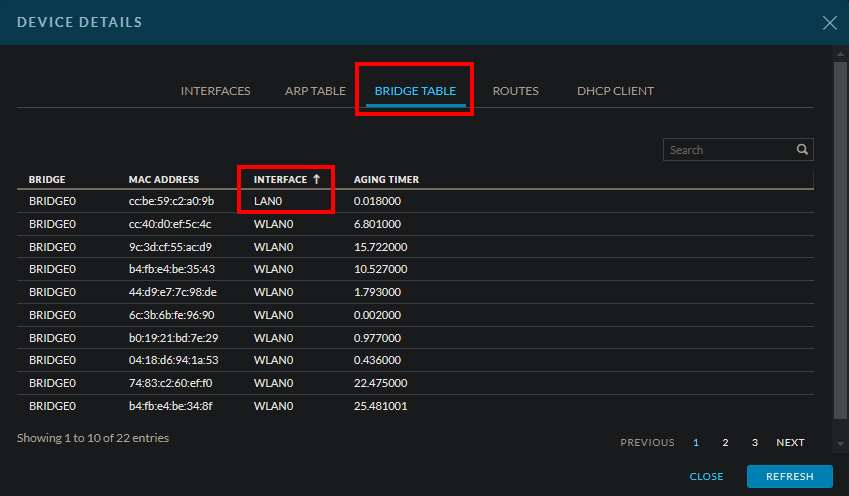
If a customer’s radio is in bridge mode you’d find their MAC in the bridge table. Sort by interface until you see lan0 appear at the top.
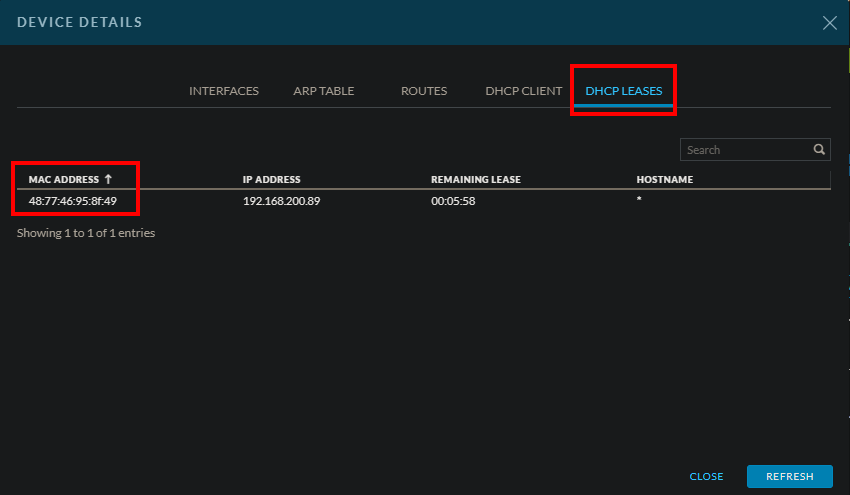
If a customer’s radio is in Router/NAT mode you’ll find their MAC in the “DHCP Leases” section.
Built-In Tools
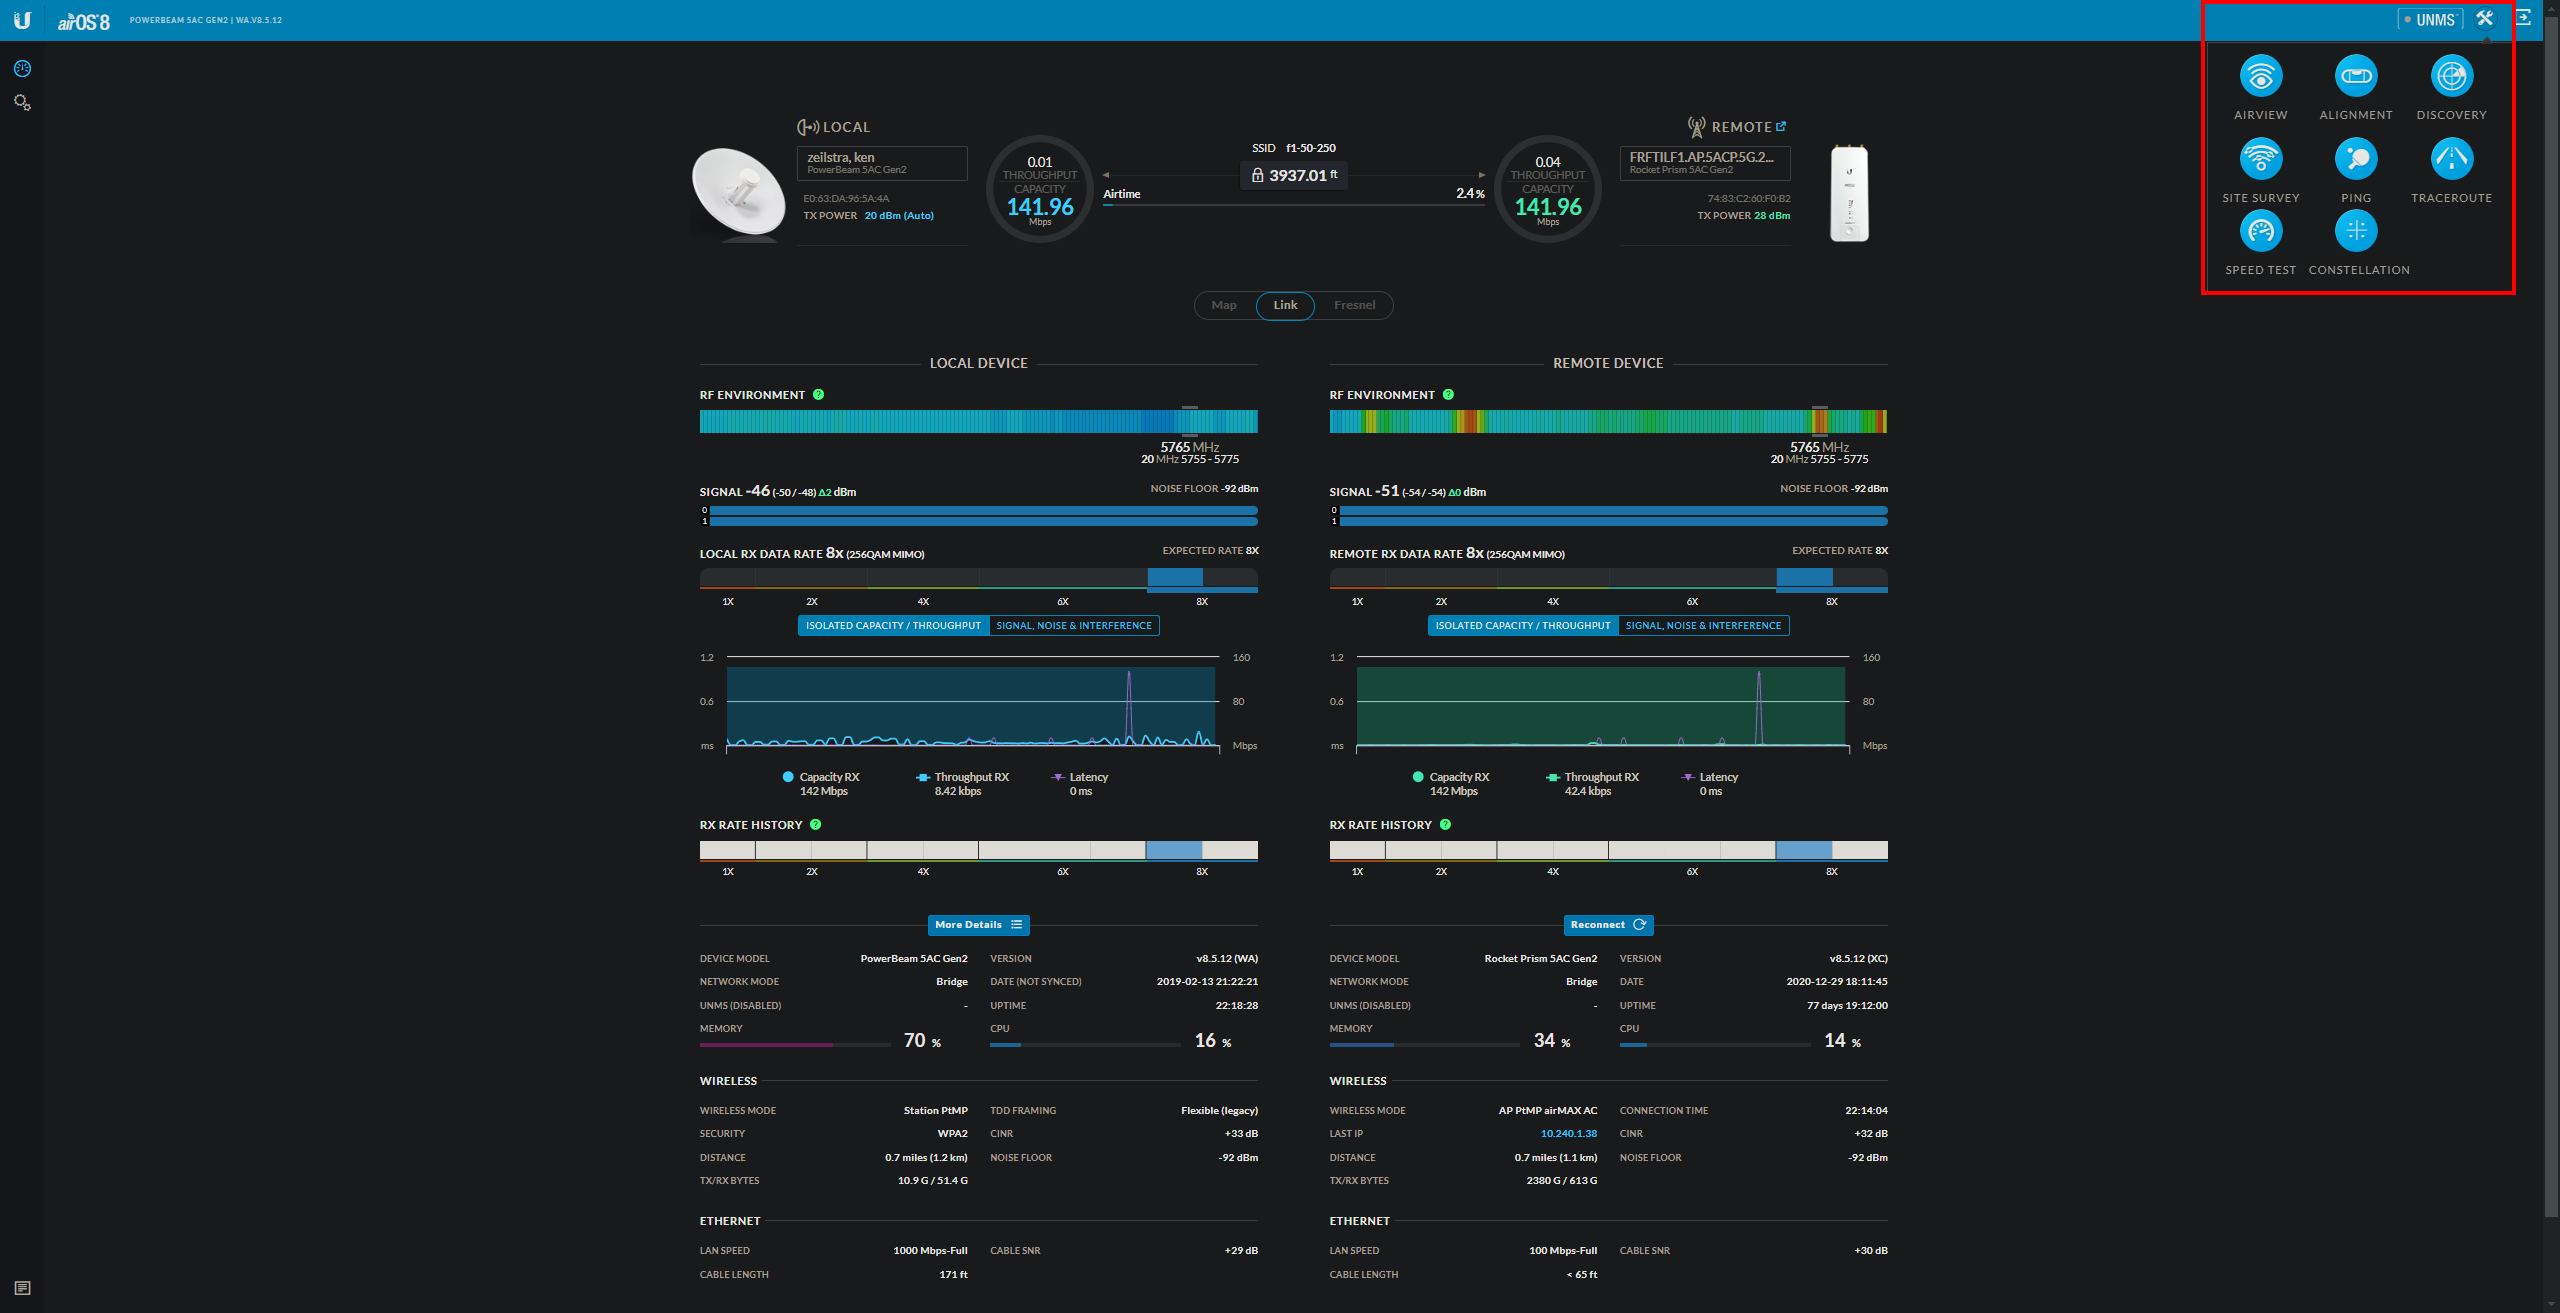
On the top right of the main splash page you should see a wrench and hammer icon. This is the tools section. Here you can find tools such as the site survey and speed test tool. The site survey tool is useful for checking for other devices that could be causing interference with their connection. The speed test tool will allow you to run a bandwidth test between any two pieces of Ubiquiti gear as long as they are both the same flavor (AirMax AC).
Site Survey Tool
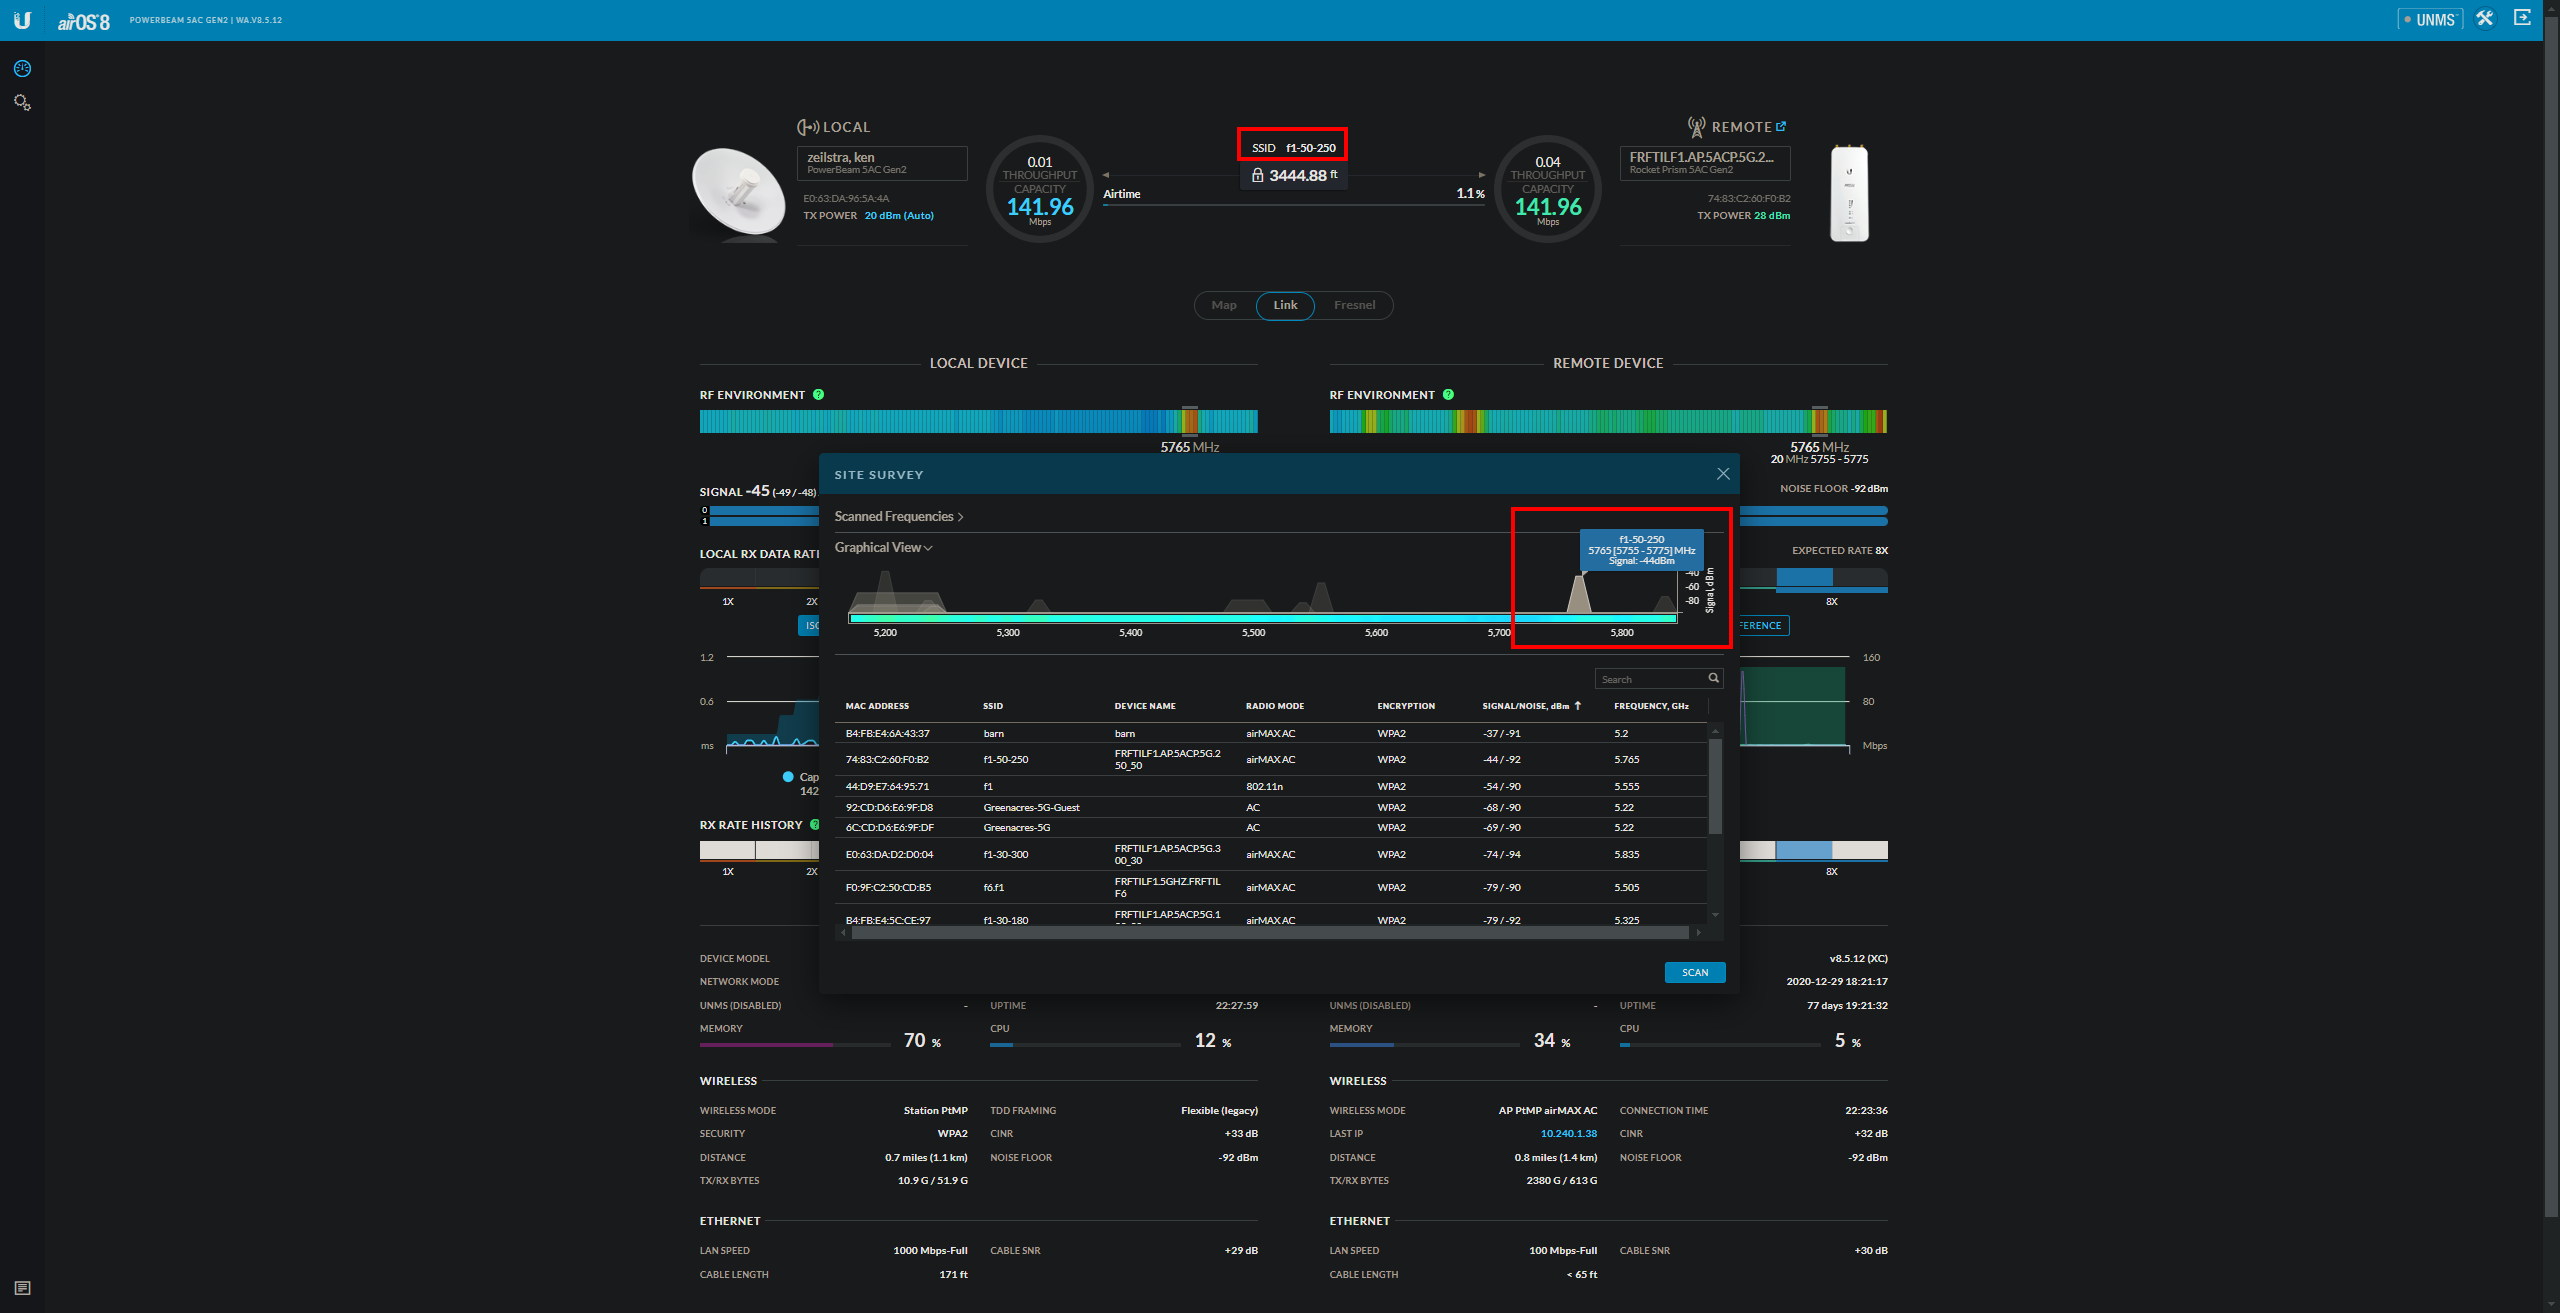
This is an example of the site survey tool. Here you can either look at the graph or list for devices on the same or partially overlapping channel/frequency. For this example, their radio doesn’t see anything overlapping where their access point is transmitting.
Speed Test Tool
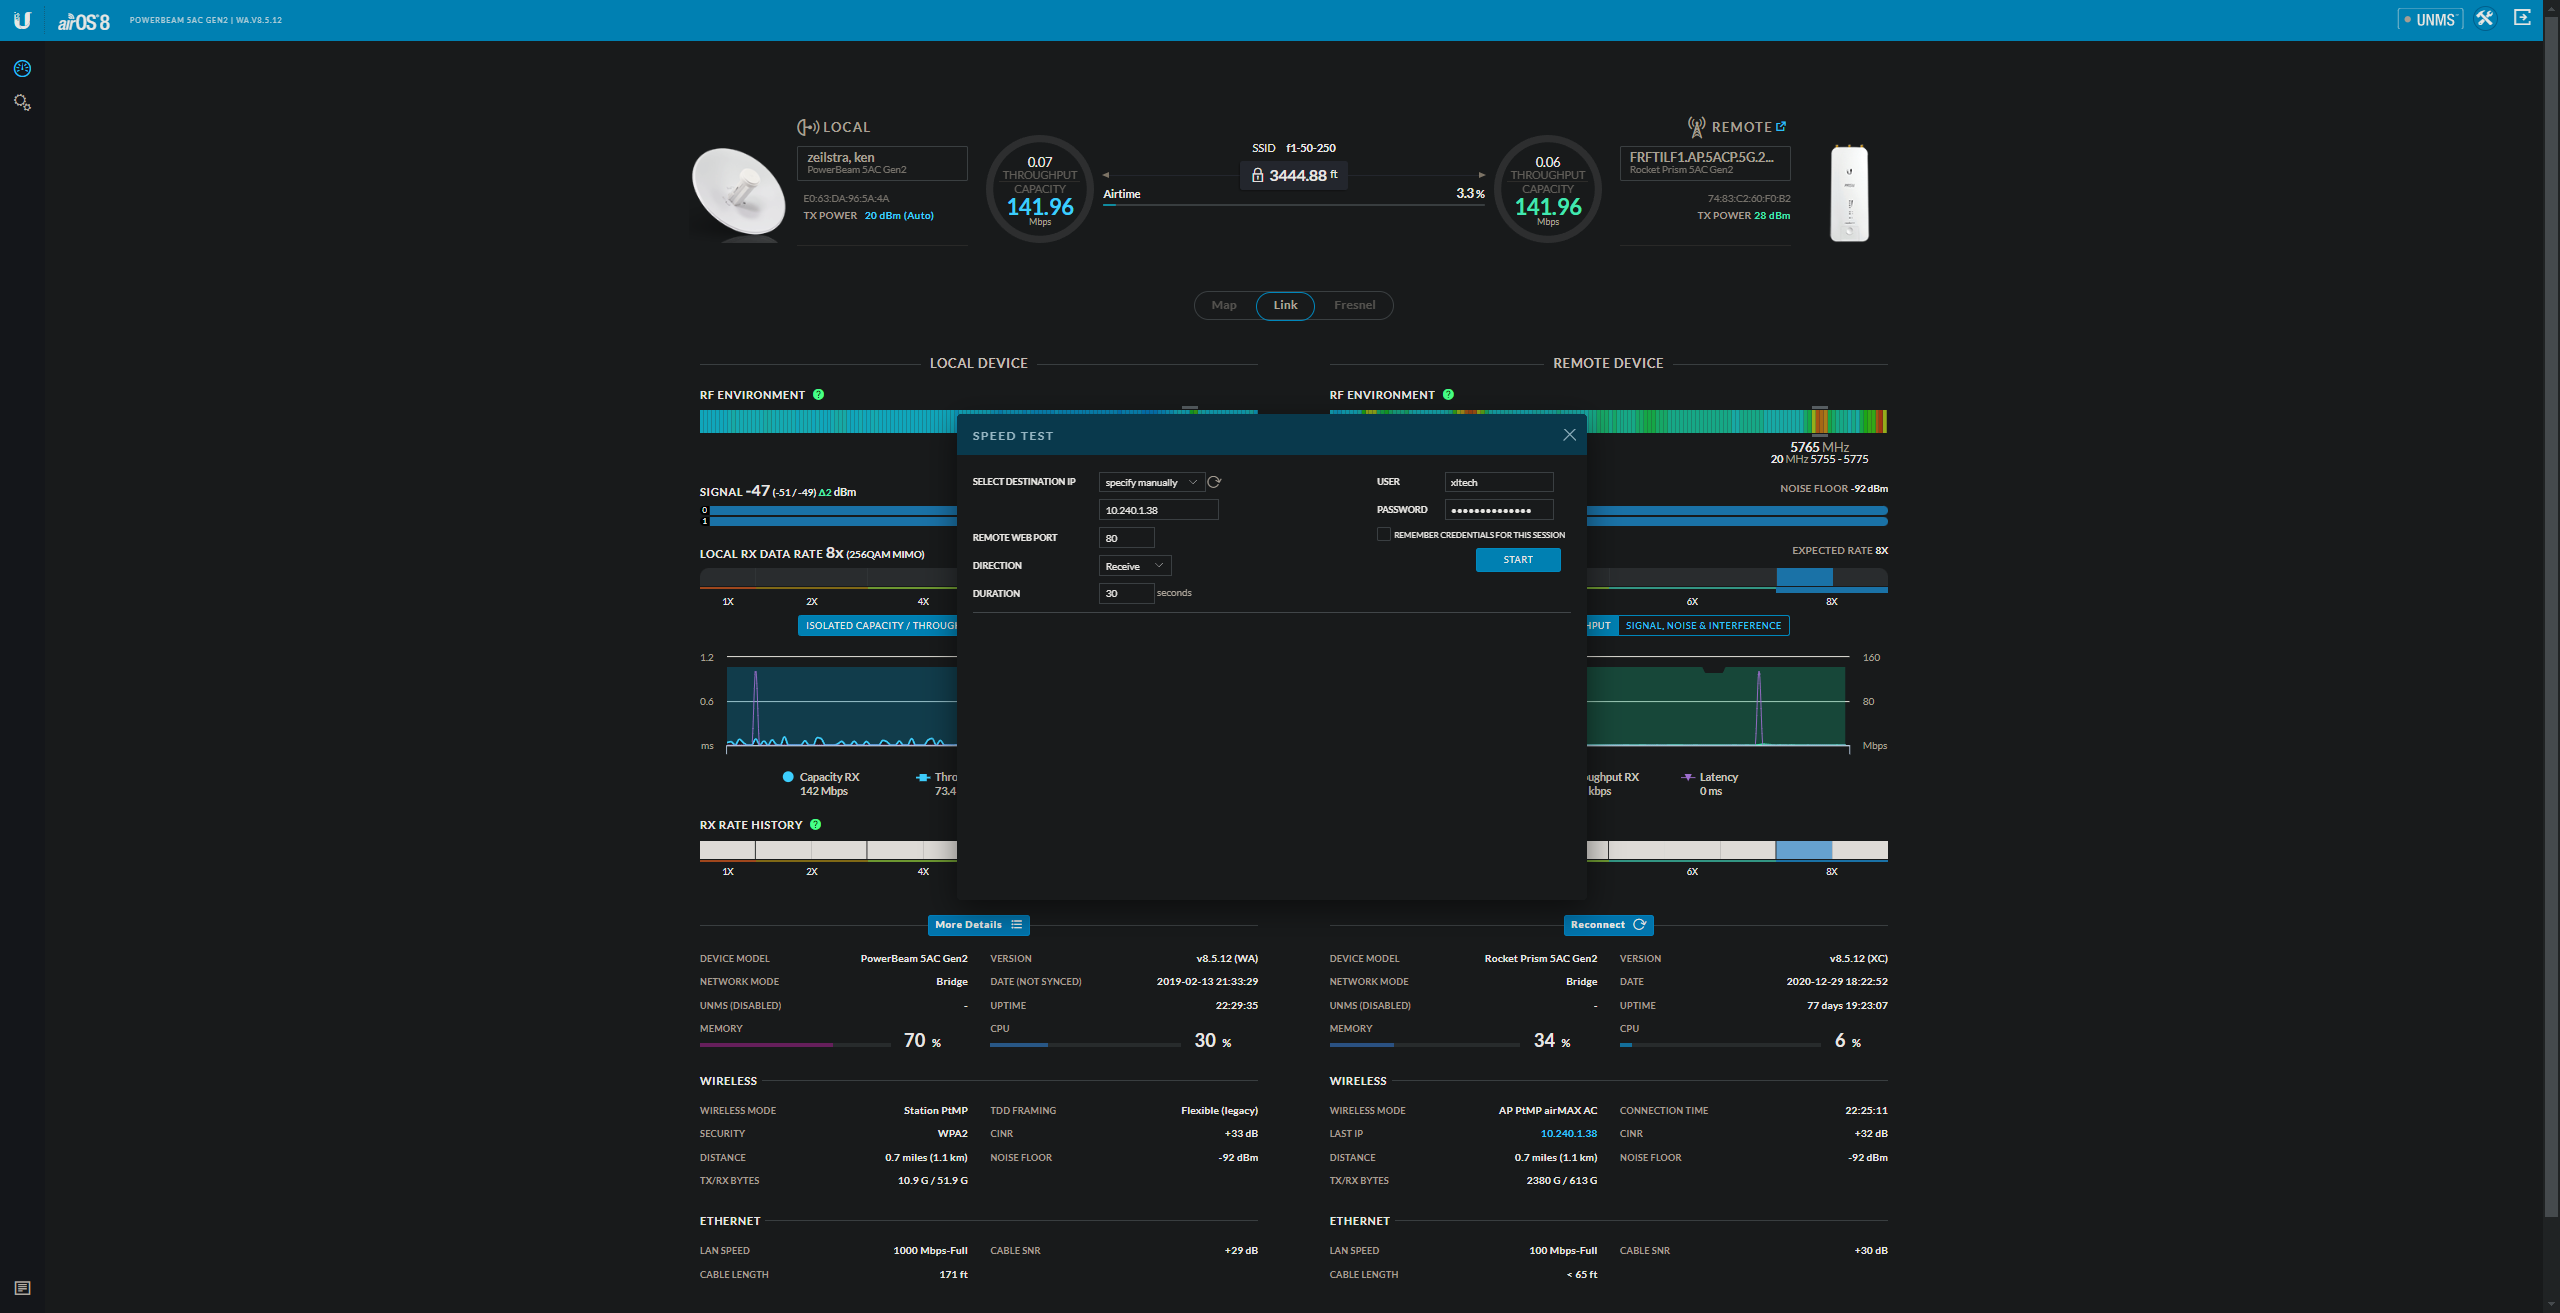
This is an example of the speed test tool. This will allow you to run a bandwidth test between any Ubiquiti AirMax AC gear. Once the tool is open you must provide the ip address of the device you wish to test to as well as the login for that device. Other than that you can dictate which direction the test runs (Transmit, Receive, Duplex). It’s recommended to avoid using duplex for a more accurate test. For more accurate testing I recommend running the test from an access point as they have a more powerful CPU. This is a very useful tool as it will allow you to run tests across towers. For example, if you know which fiber tower the customer connects to (Man6, Gp4) you can login to an AP on that tower and run a test to their SM testing every backhaul, router, and switch along the way for slowdowns in their connection.
Changing AP
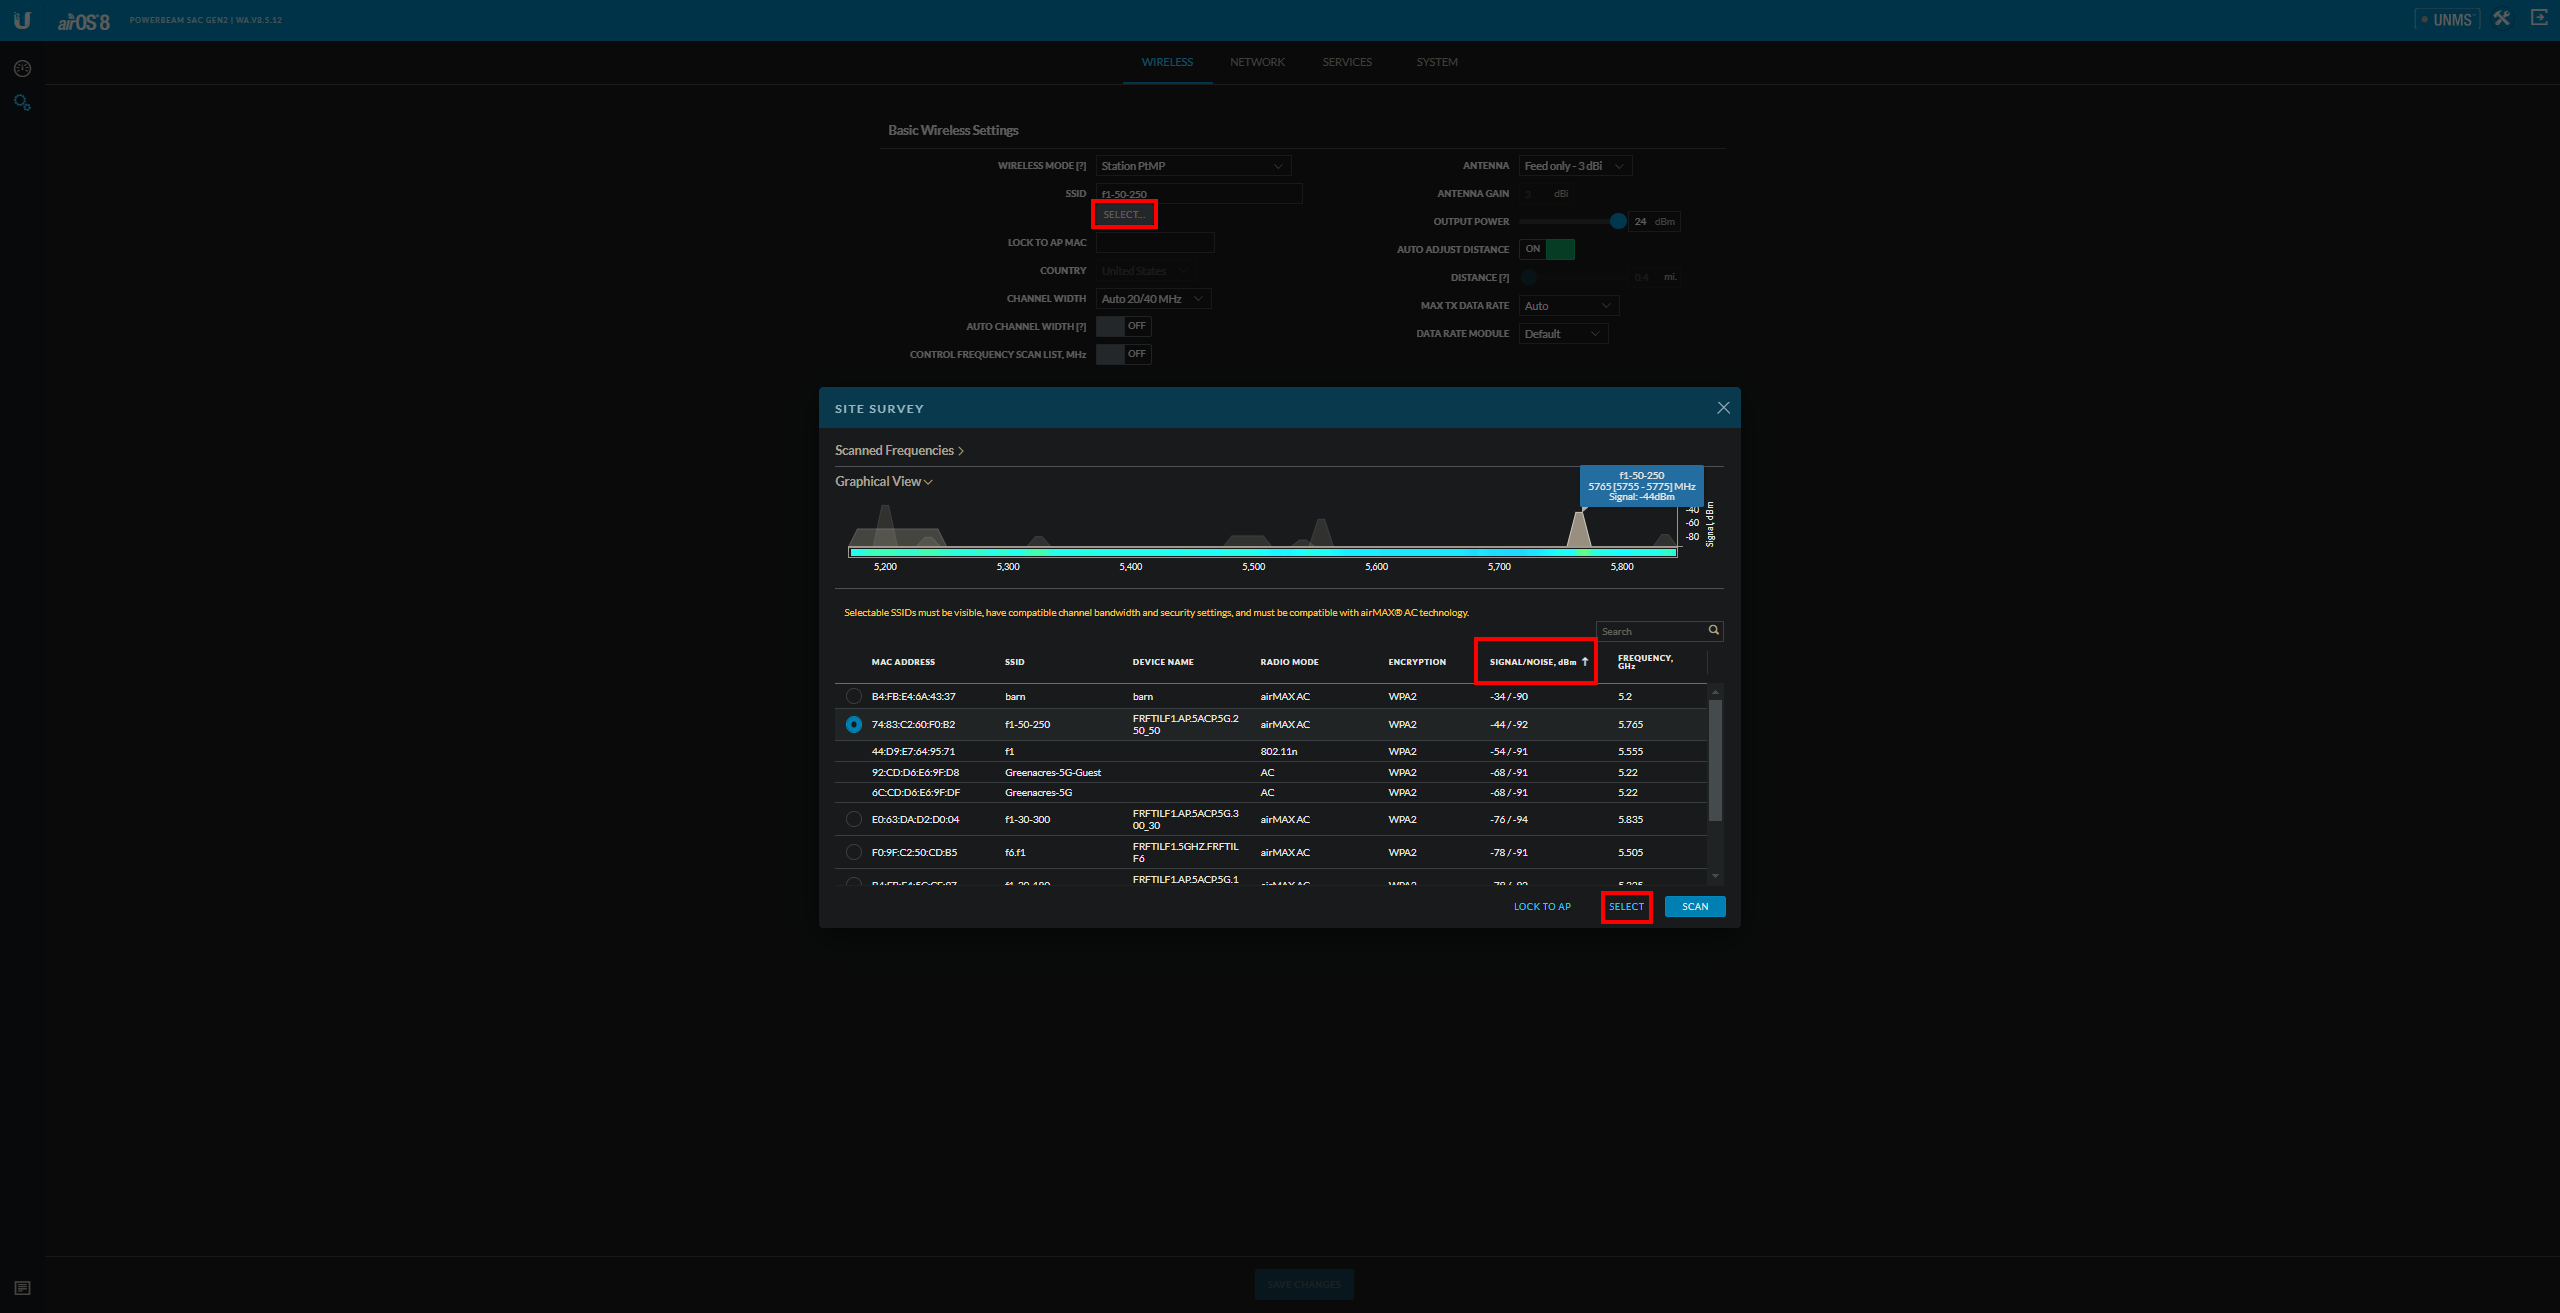
This is what the page would look like when scanning for a potential better AP for the customer. To navigate to this page you would click on the gear icon and then on the top of the page navigate to the wireless section. Once on the page, you would click on “Select” and it will open up the site survey window. Once its scan is complete you want to sort by signal strength to see the best options available.
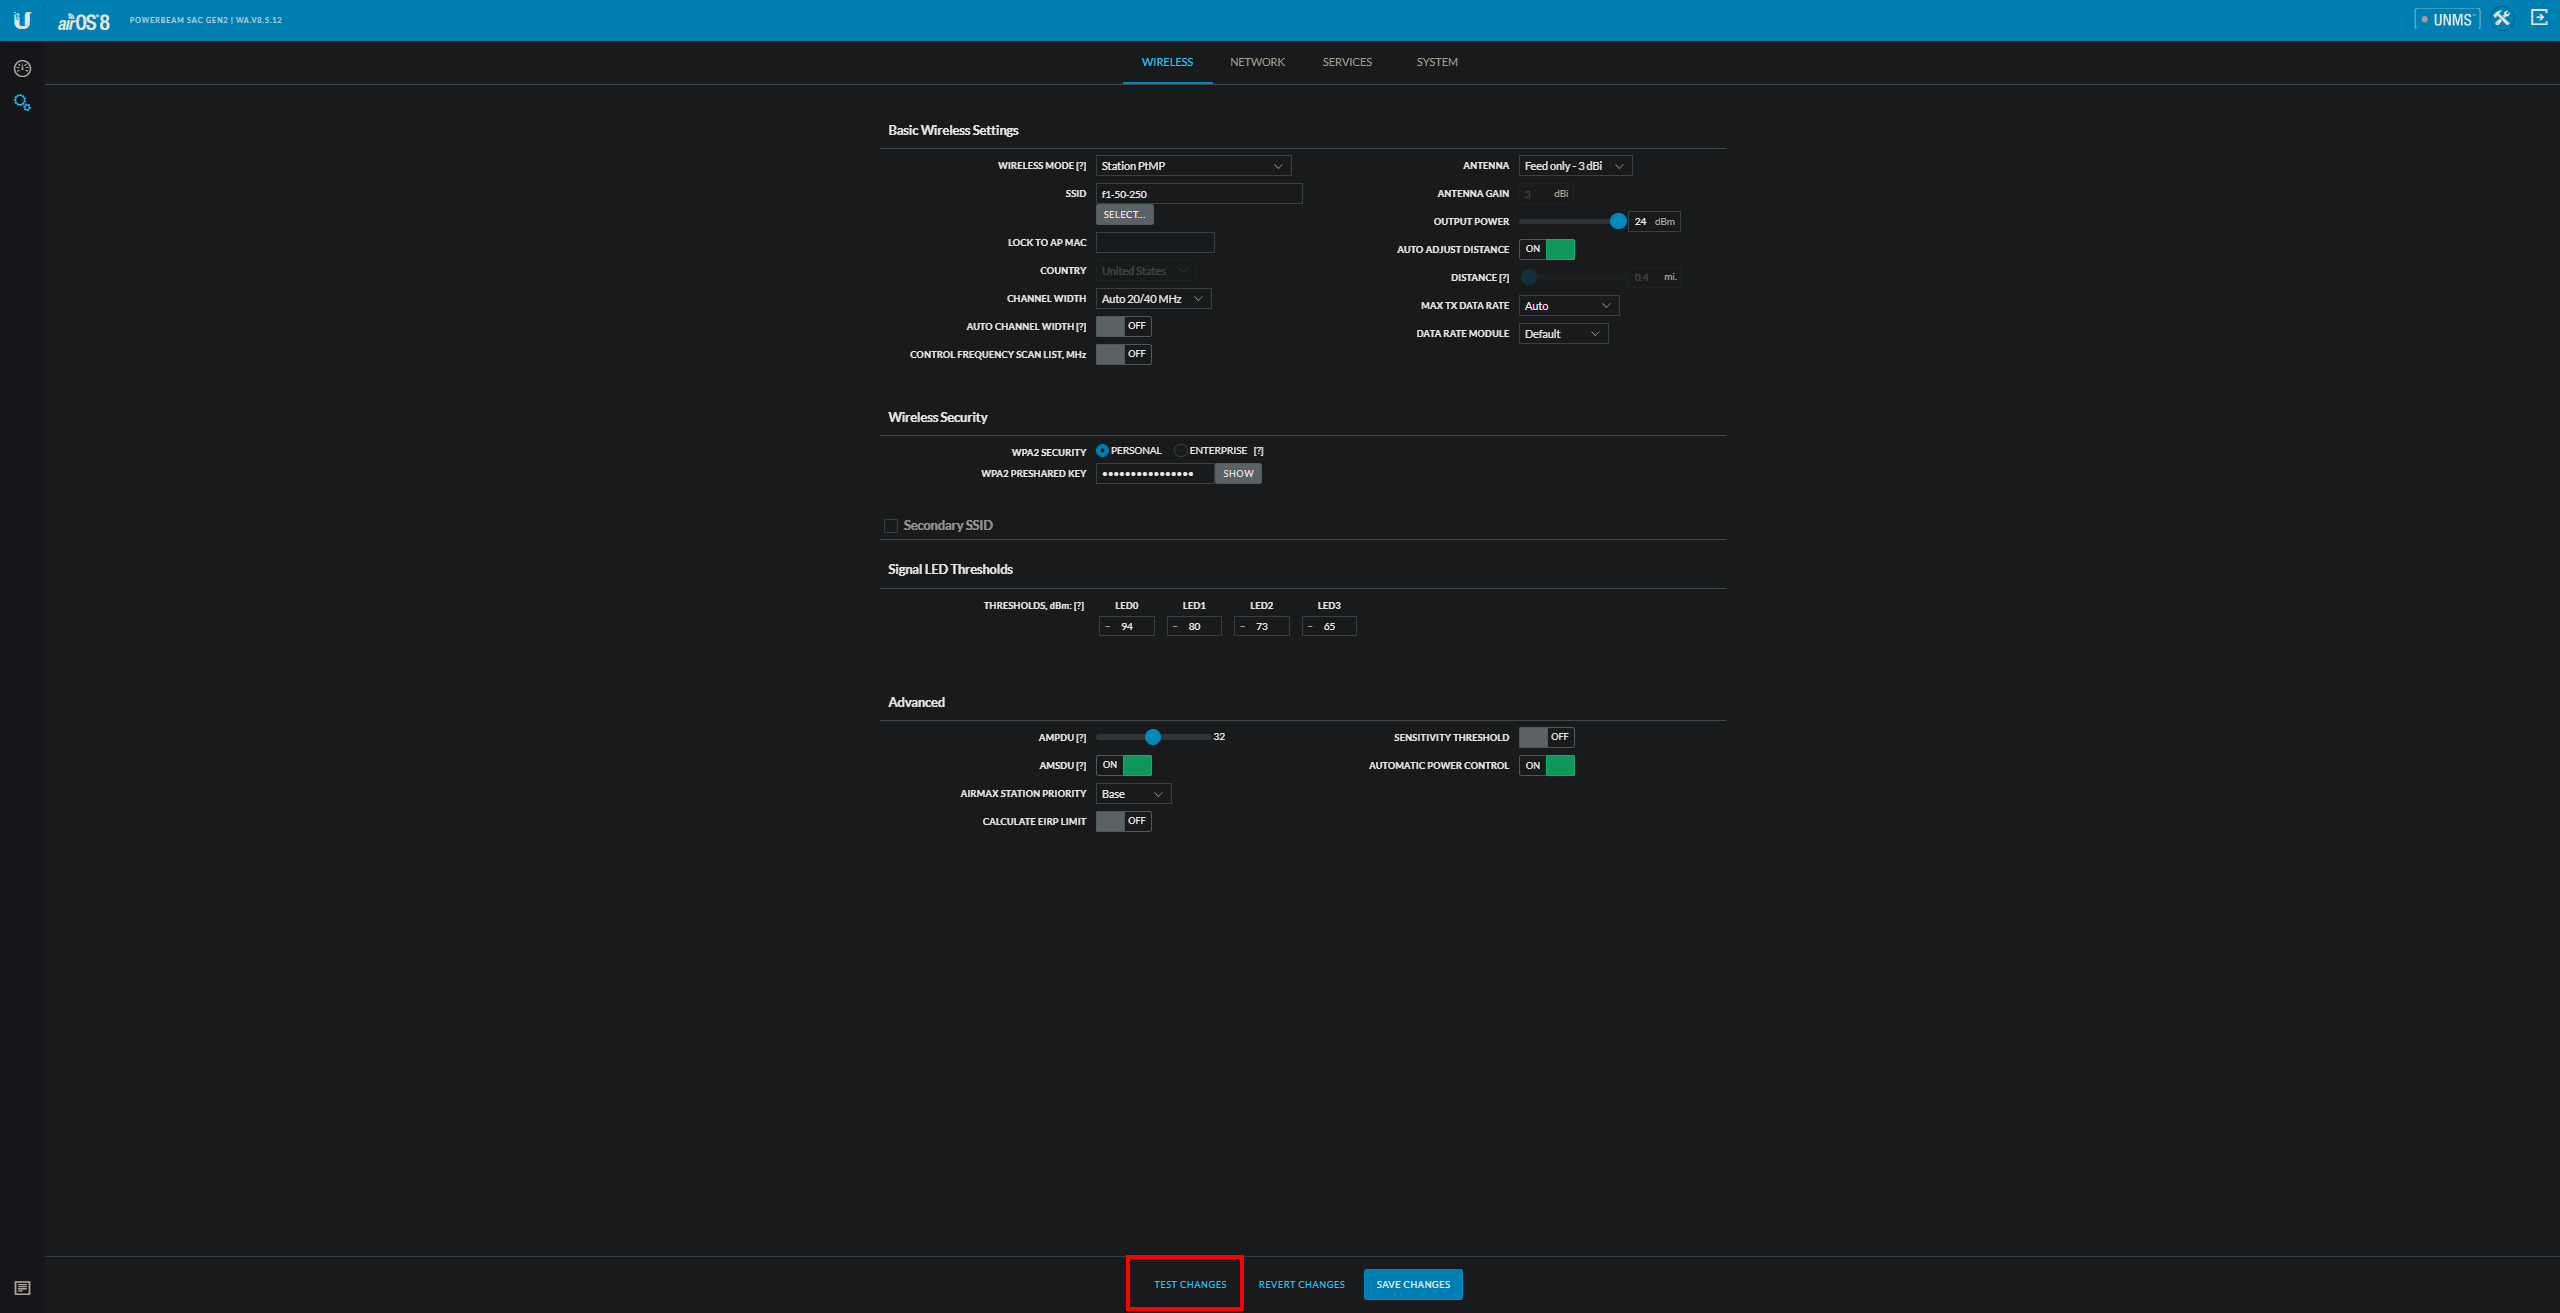
Once a new AP is selected you would want to “Test Changes” to make sure the radio reconnects successfully otherwise it might not come back and they would need a service call to fix their connection.
Device Not Probing
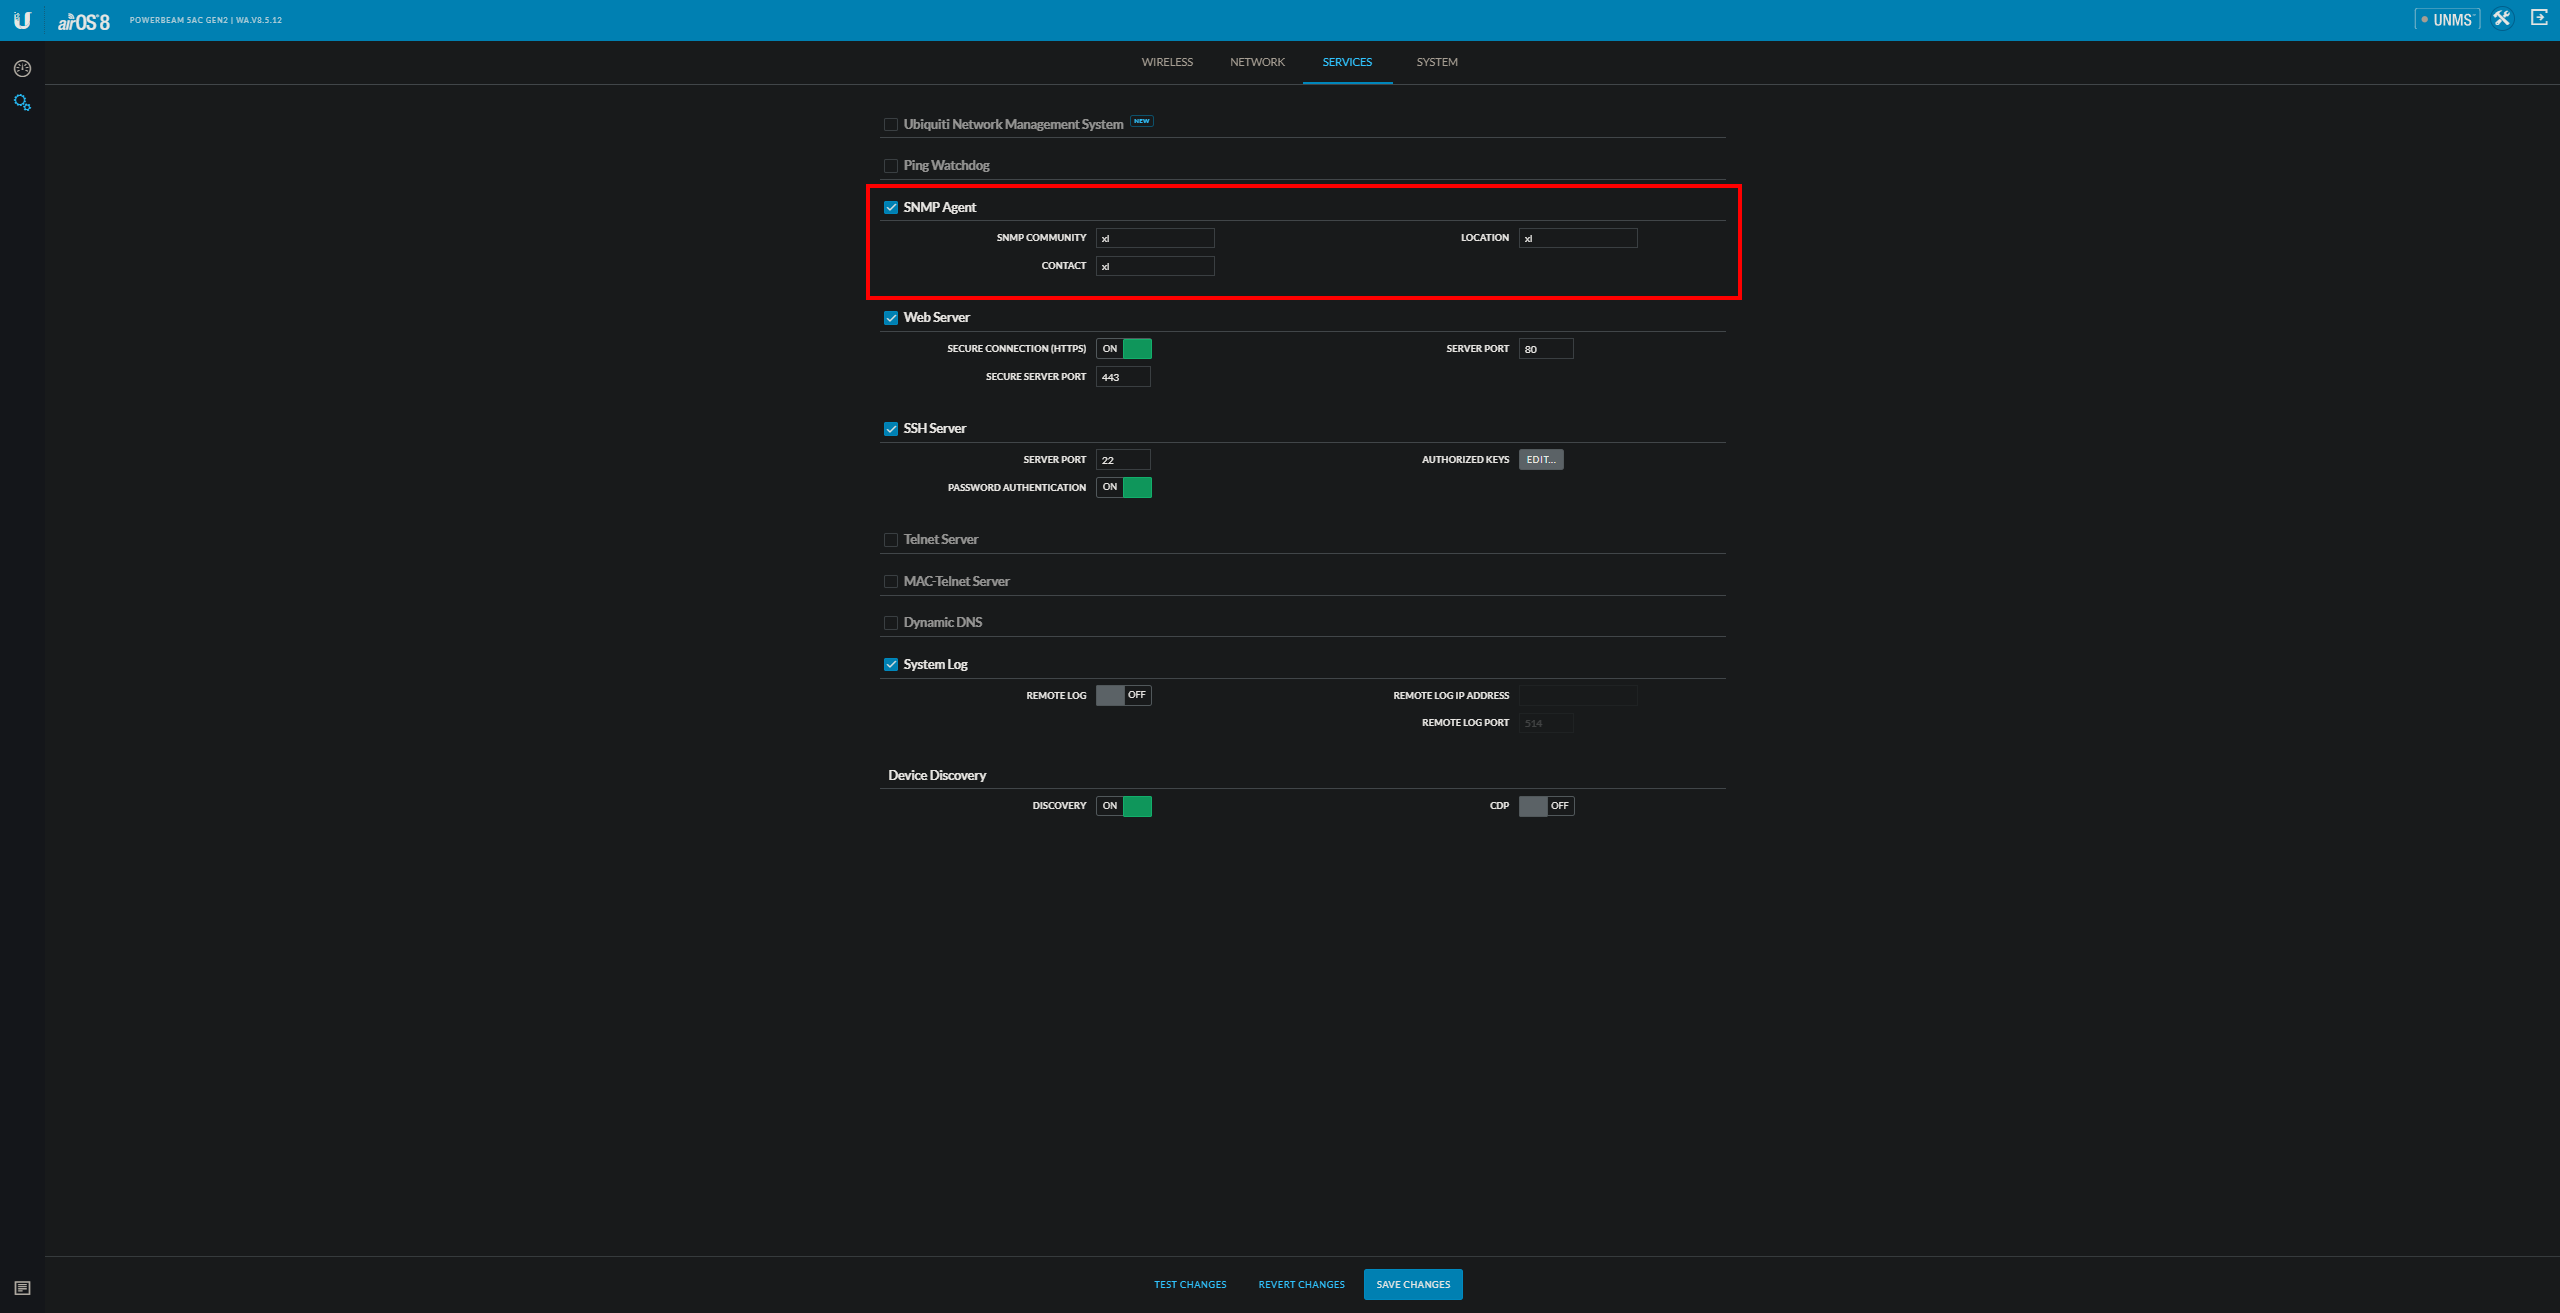
If a customer’s radio is not pulling probes in PowerCode their SNMP settings may be incorrect. Verify in their PowerCode device entry and radio settings that the SNMP string is correct and the SNMP agent is enabled. The string used in XL is “xl”.
Device Name / Remote Reboot
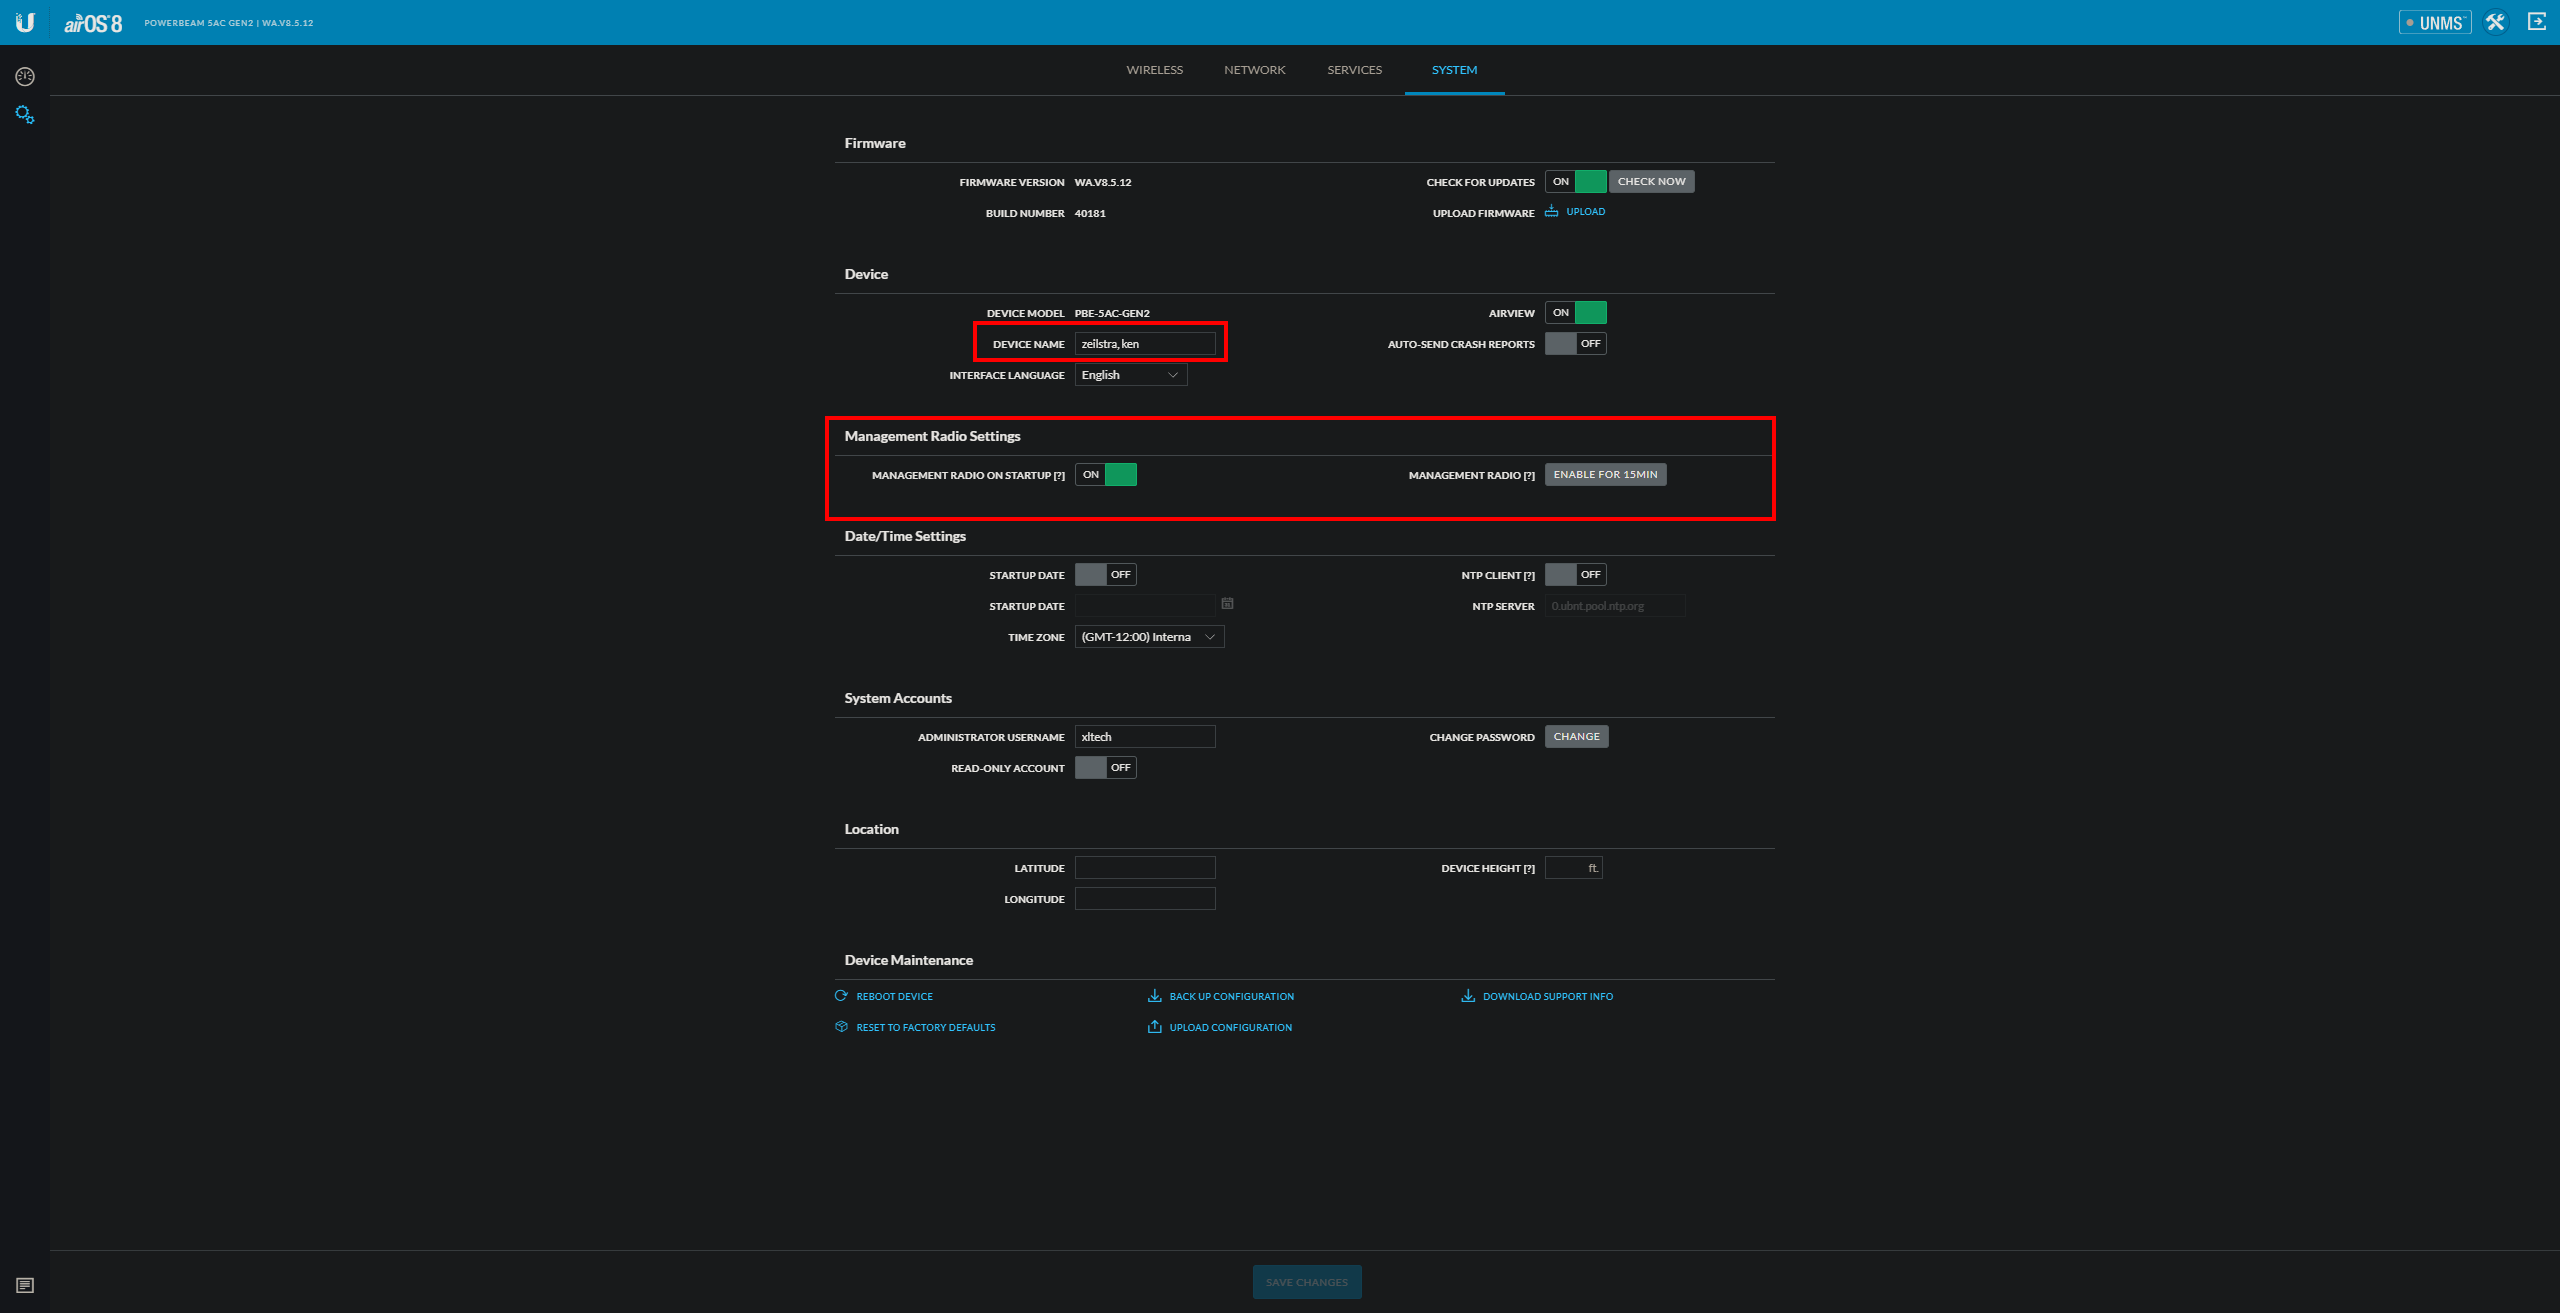
This is the system tab in the device settings. Here is where you would update the radio name on account takeover. This is also where you can reboot the radio if needed. While on this page it would be appreciated if you could make sure the management radio is enabled. This would provide field techs with wireless access to the radio while on site which can come in handy.
Bridged Settings

This is what the settings should look like in a radio that is in bridge mode. Always make sure the management address is set to DHCP.
NAT Settings
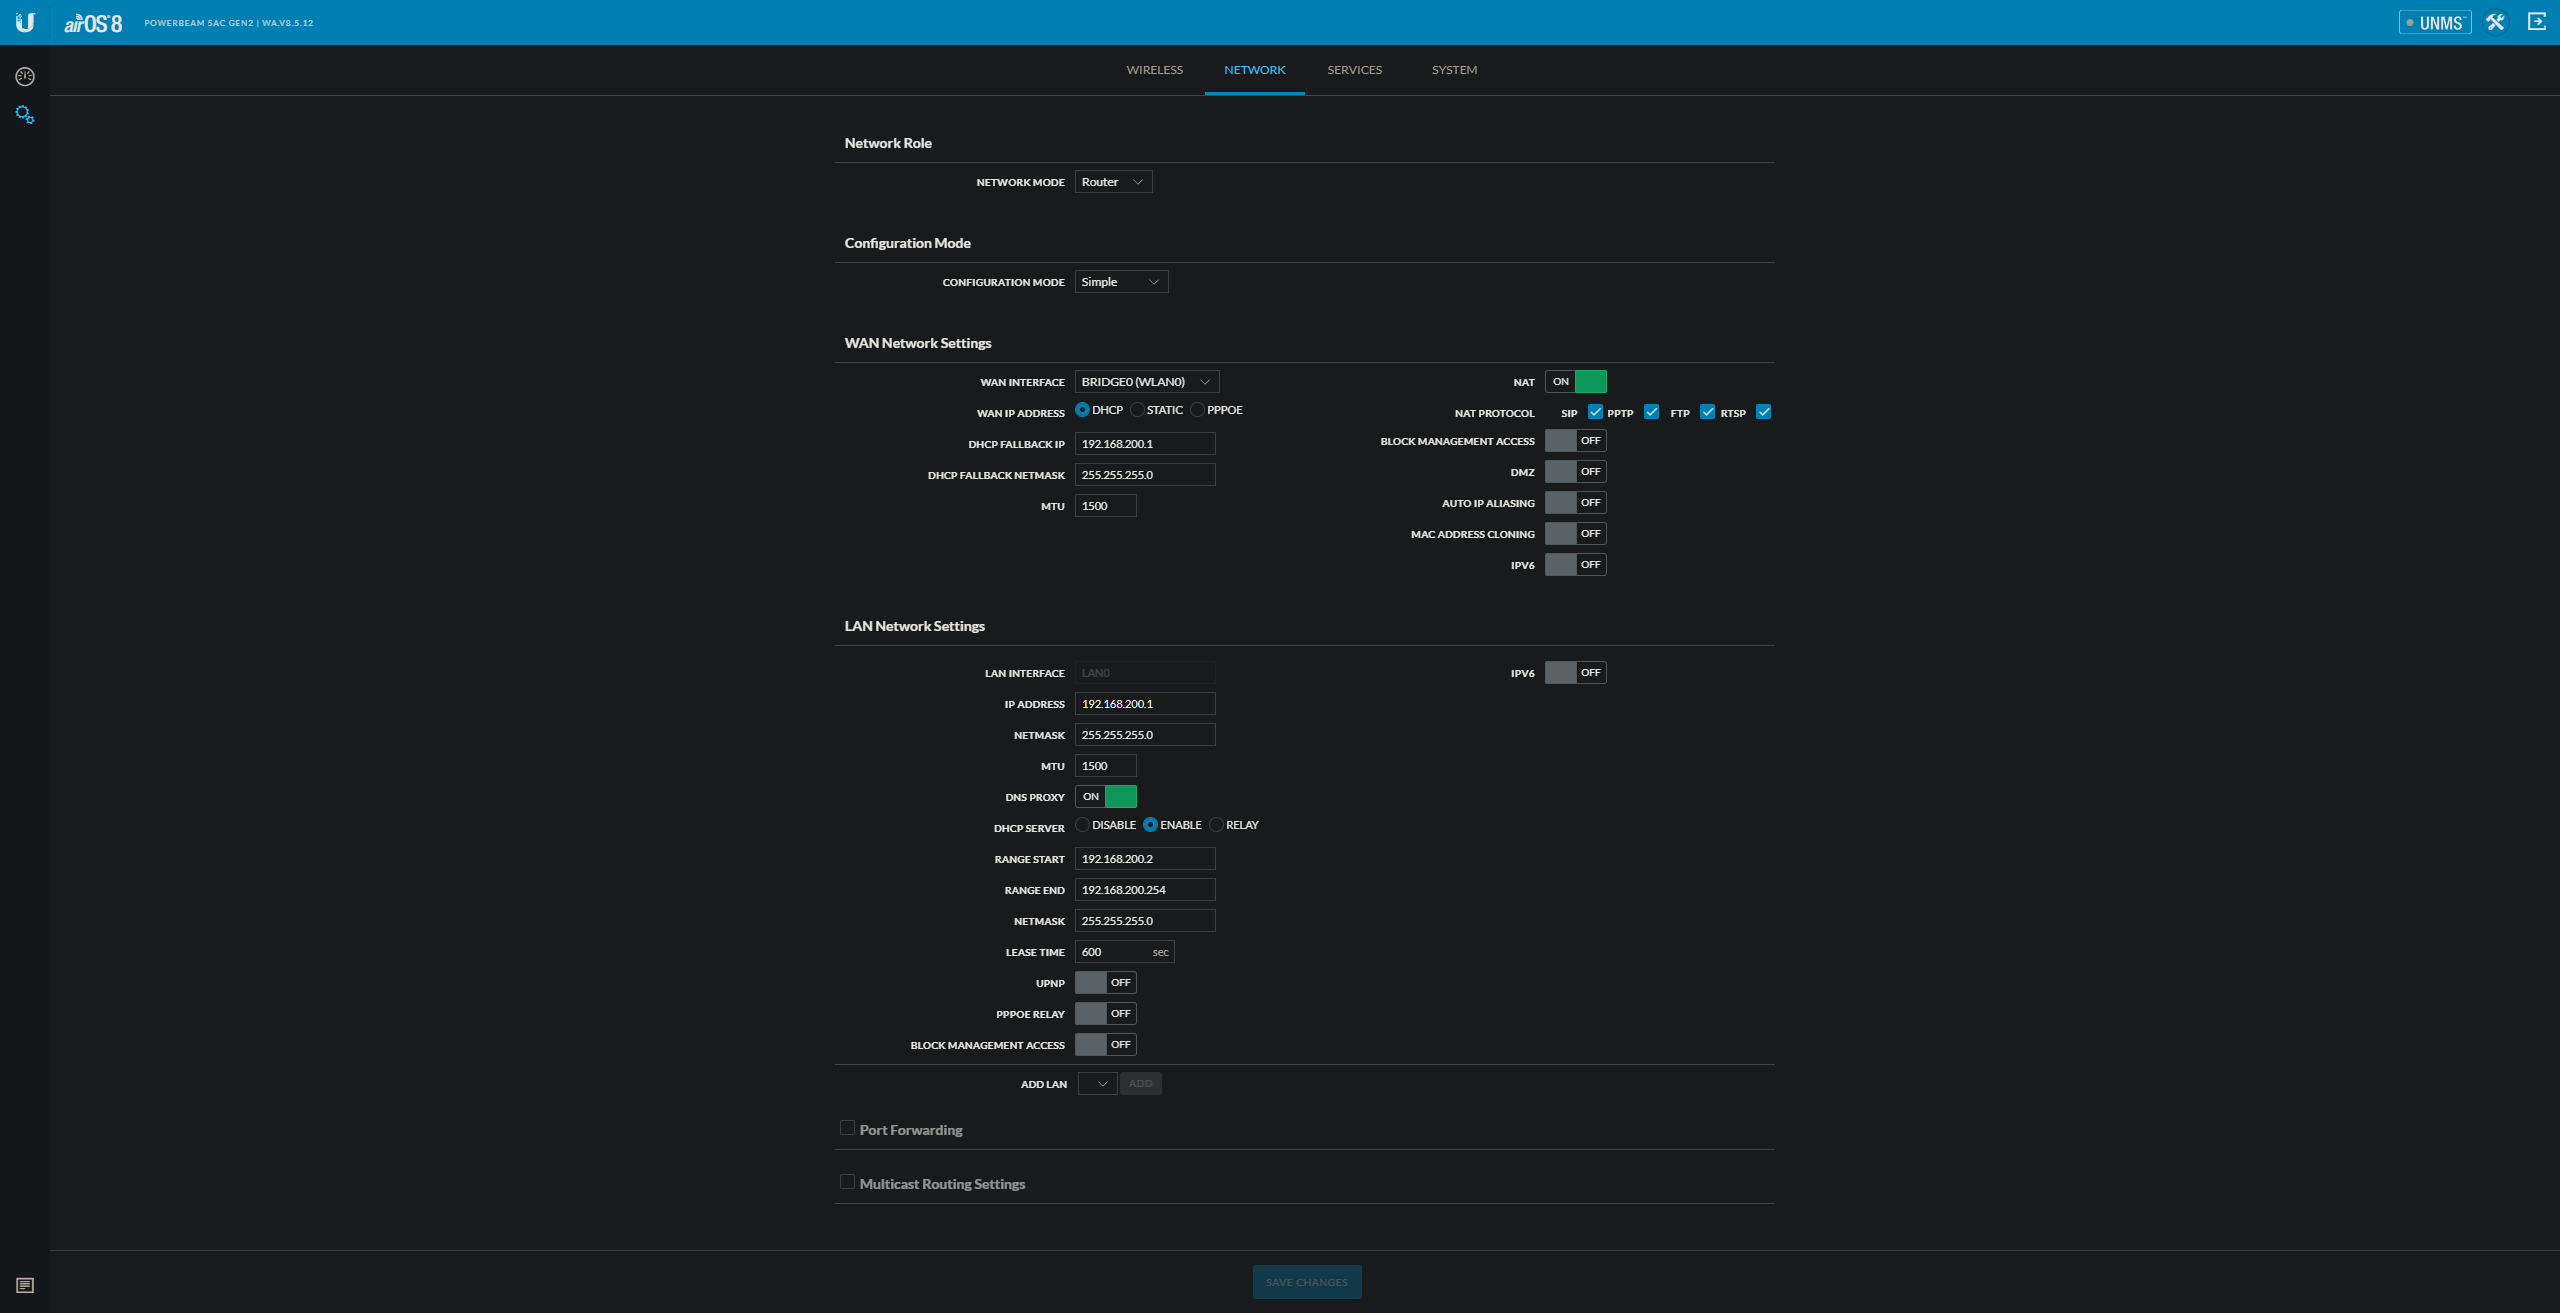
These are the correct settings for a radio that is in NAT mode.