Main Splash Page
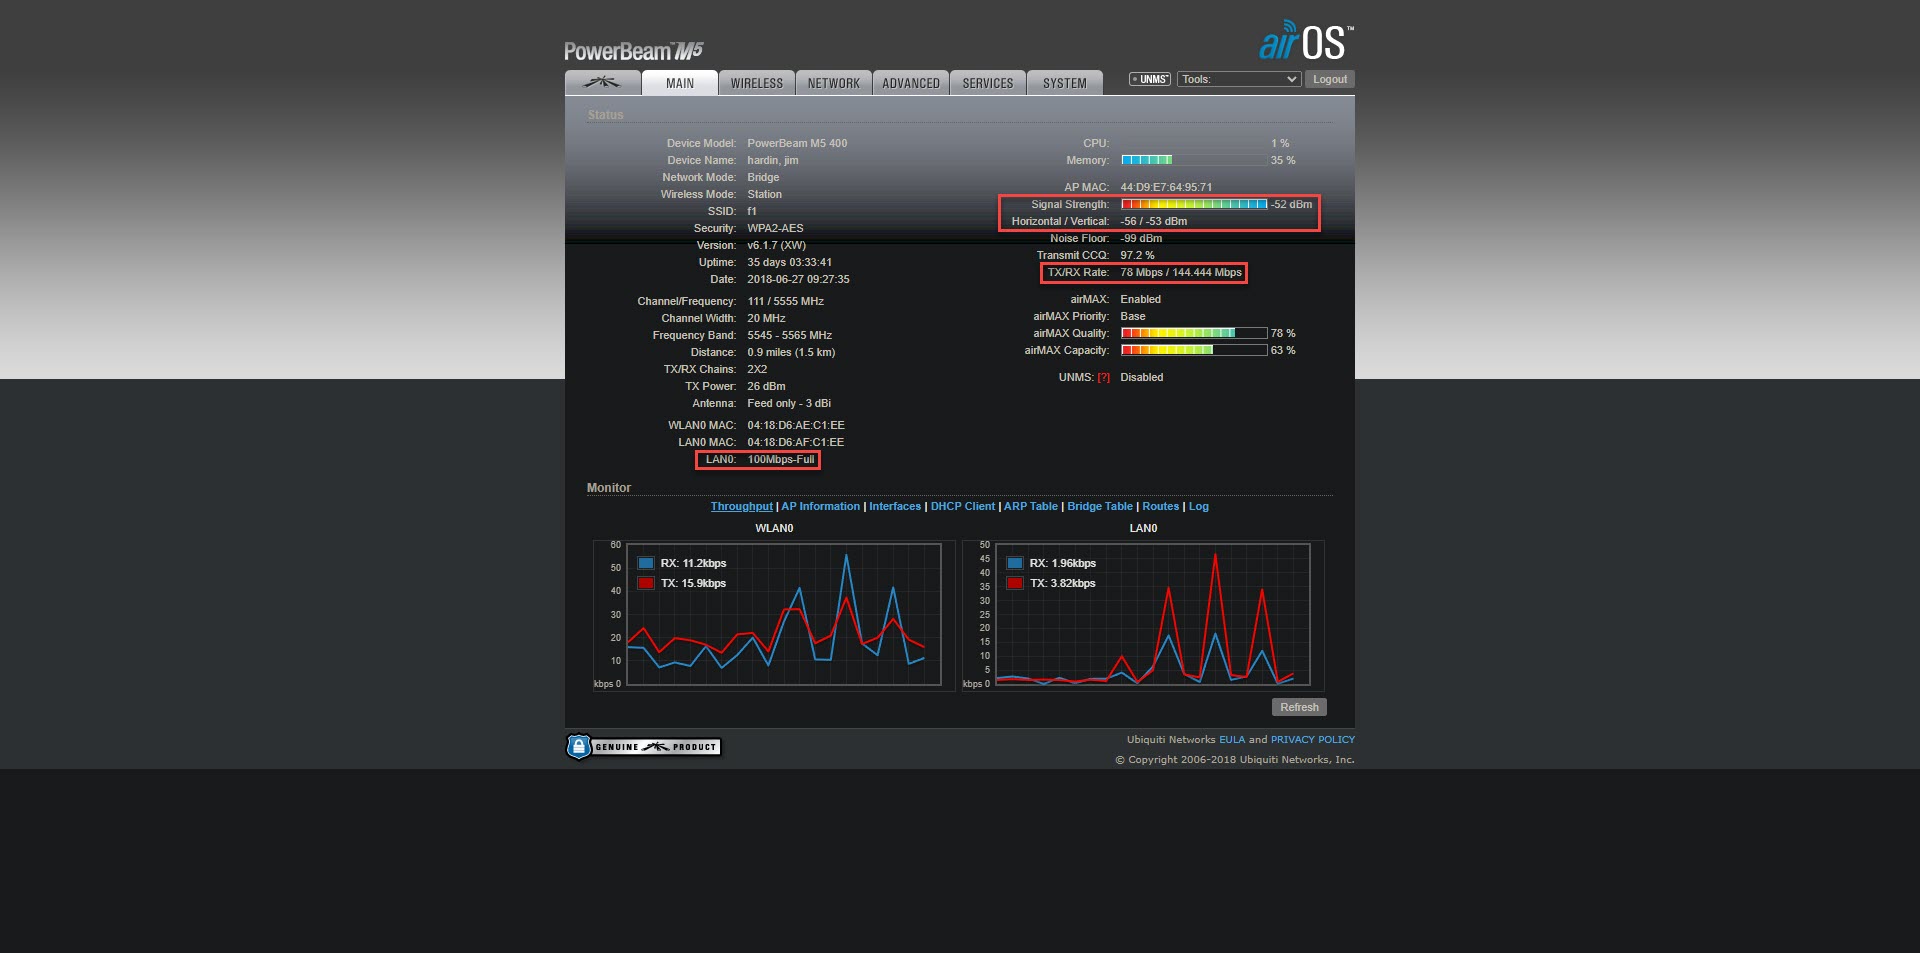
After logging into a Ubiquiti AirMax M5 radio, this is the main splash page. Some relevant information on the page would be the radio’s uplink and downlink capacity. For this radio, their capacity is 144Mbps for download and 78Mbps for upload. Some other pertinent information would be the radio’s signal, chains, and LAN speed. Some less relevant but still important information would be the radio’s uptime.
Device Log
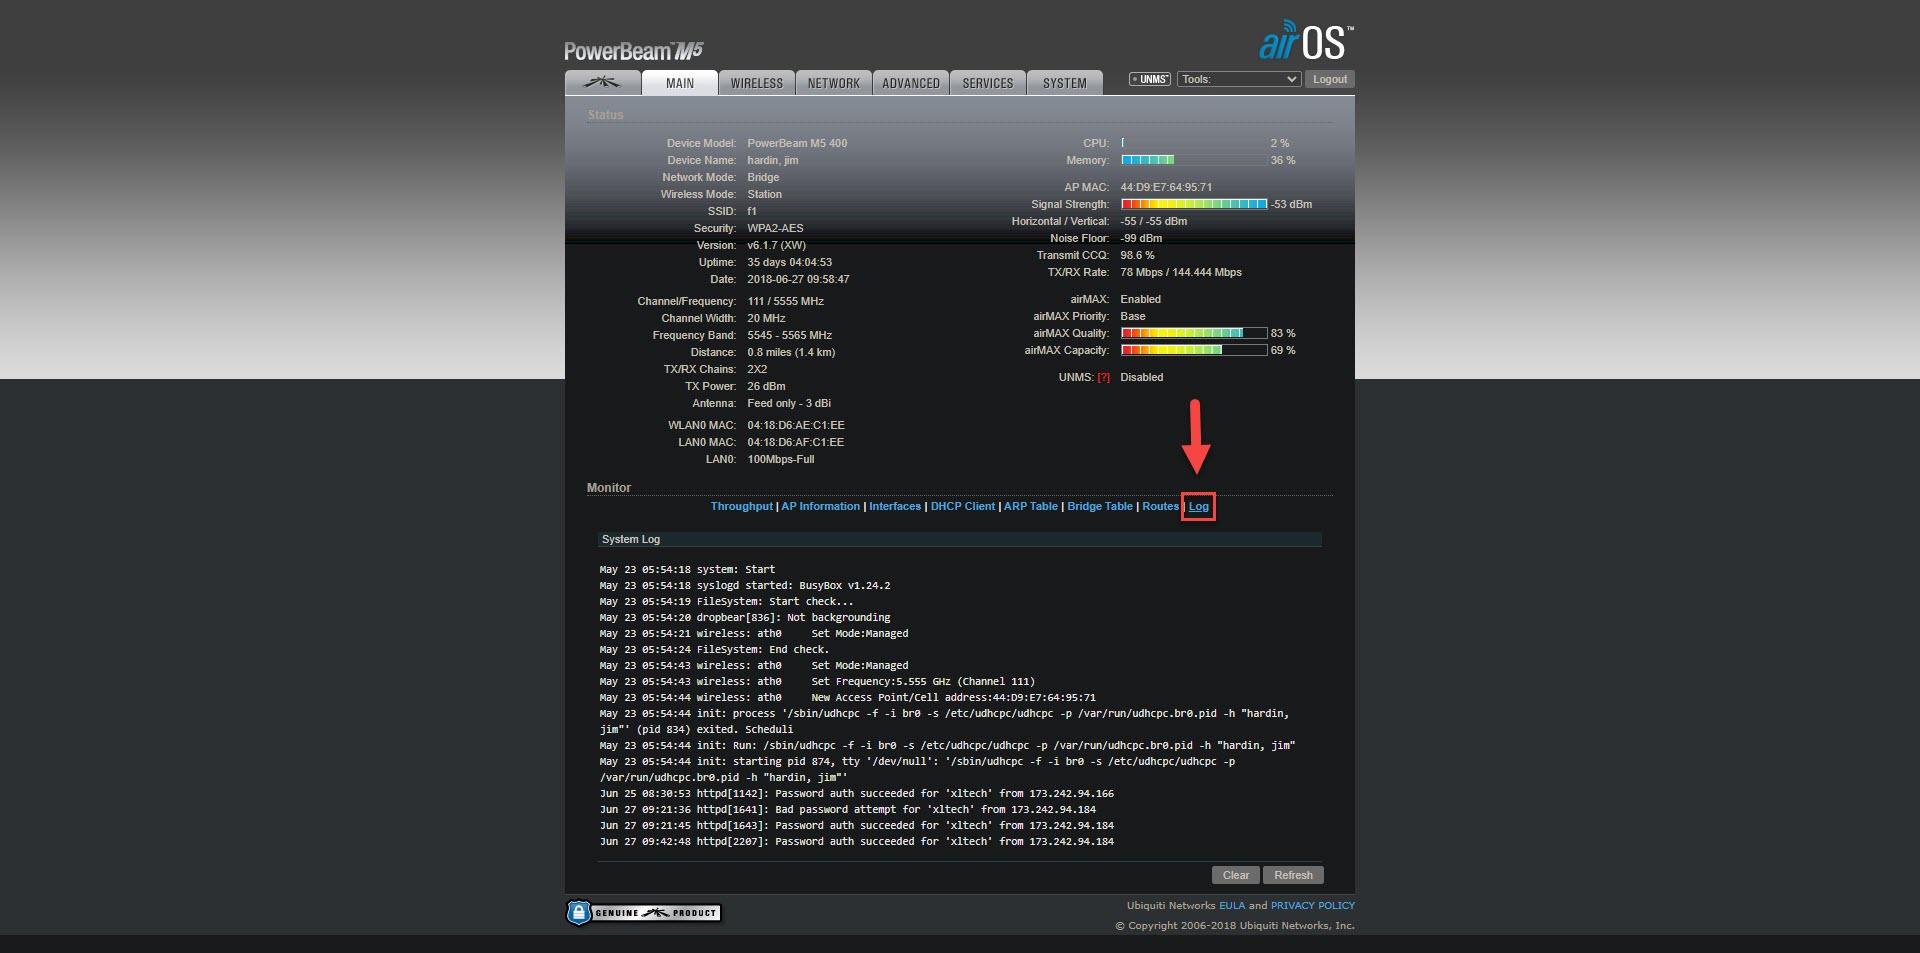
Bottom right of the main splash page you will find the device log. Here is where the operation of the radio will be logged since boot. This is the only place to check for an intermittent LAN connection. When troubleshooting, remember that the log will clear on reboot, so it’s a good idea to look beforehand.
Customer Router/Lan MAC
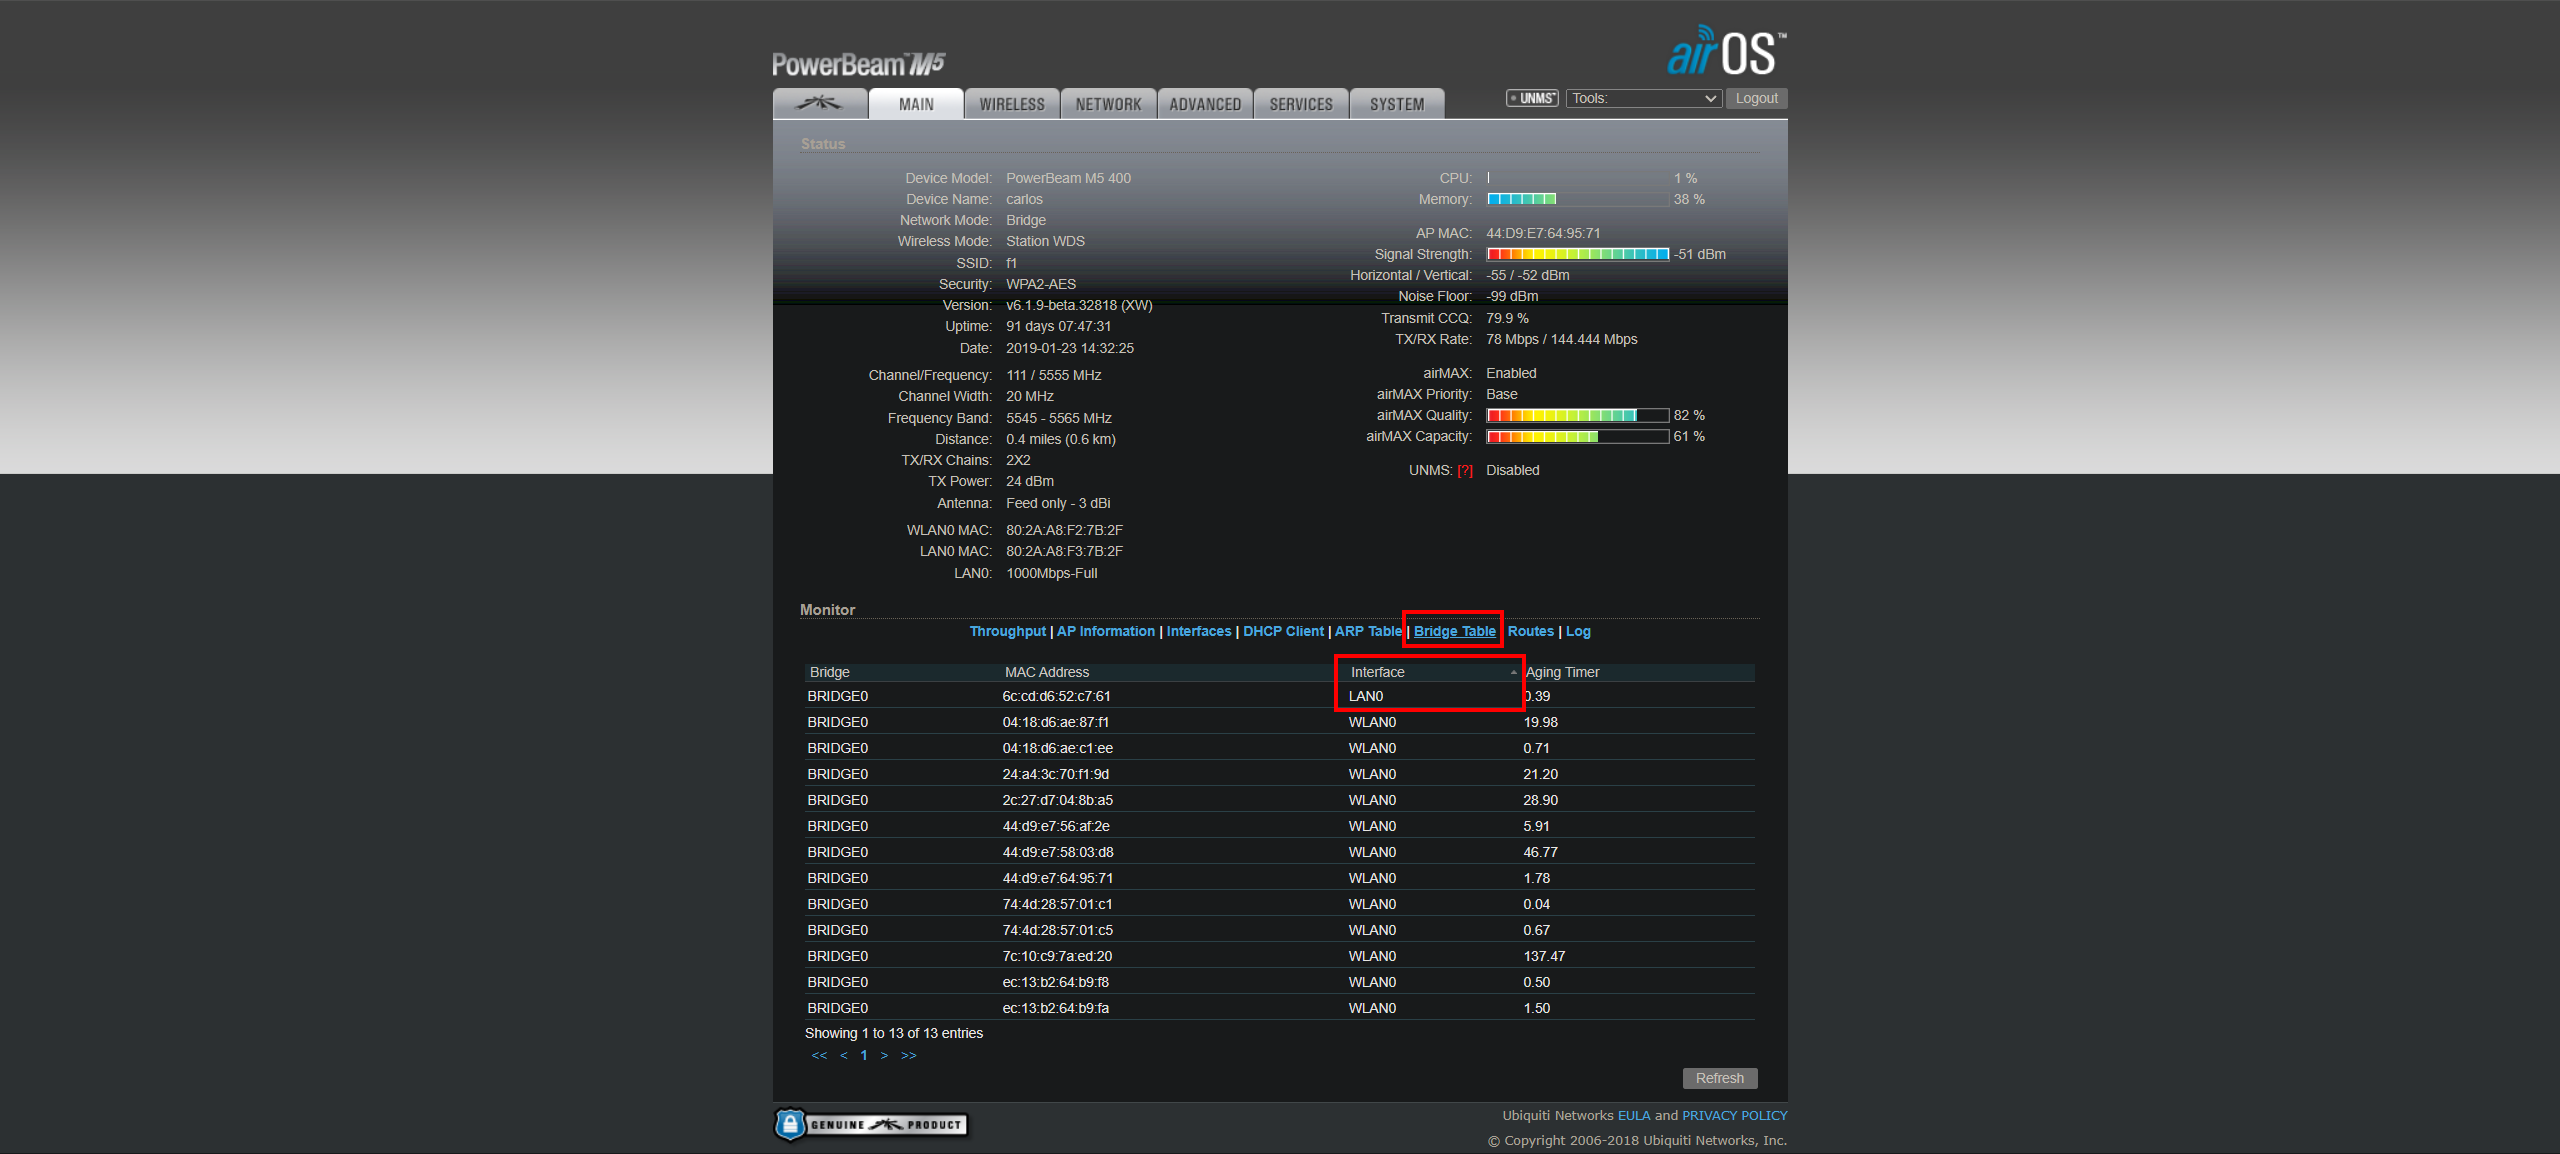
If the customer’s radio is in bridge mode you will find their MAC address under “Bridge Table”. Once there sort by “Interface” and their lan0 entry should jump to the top.
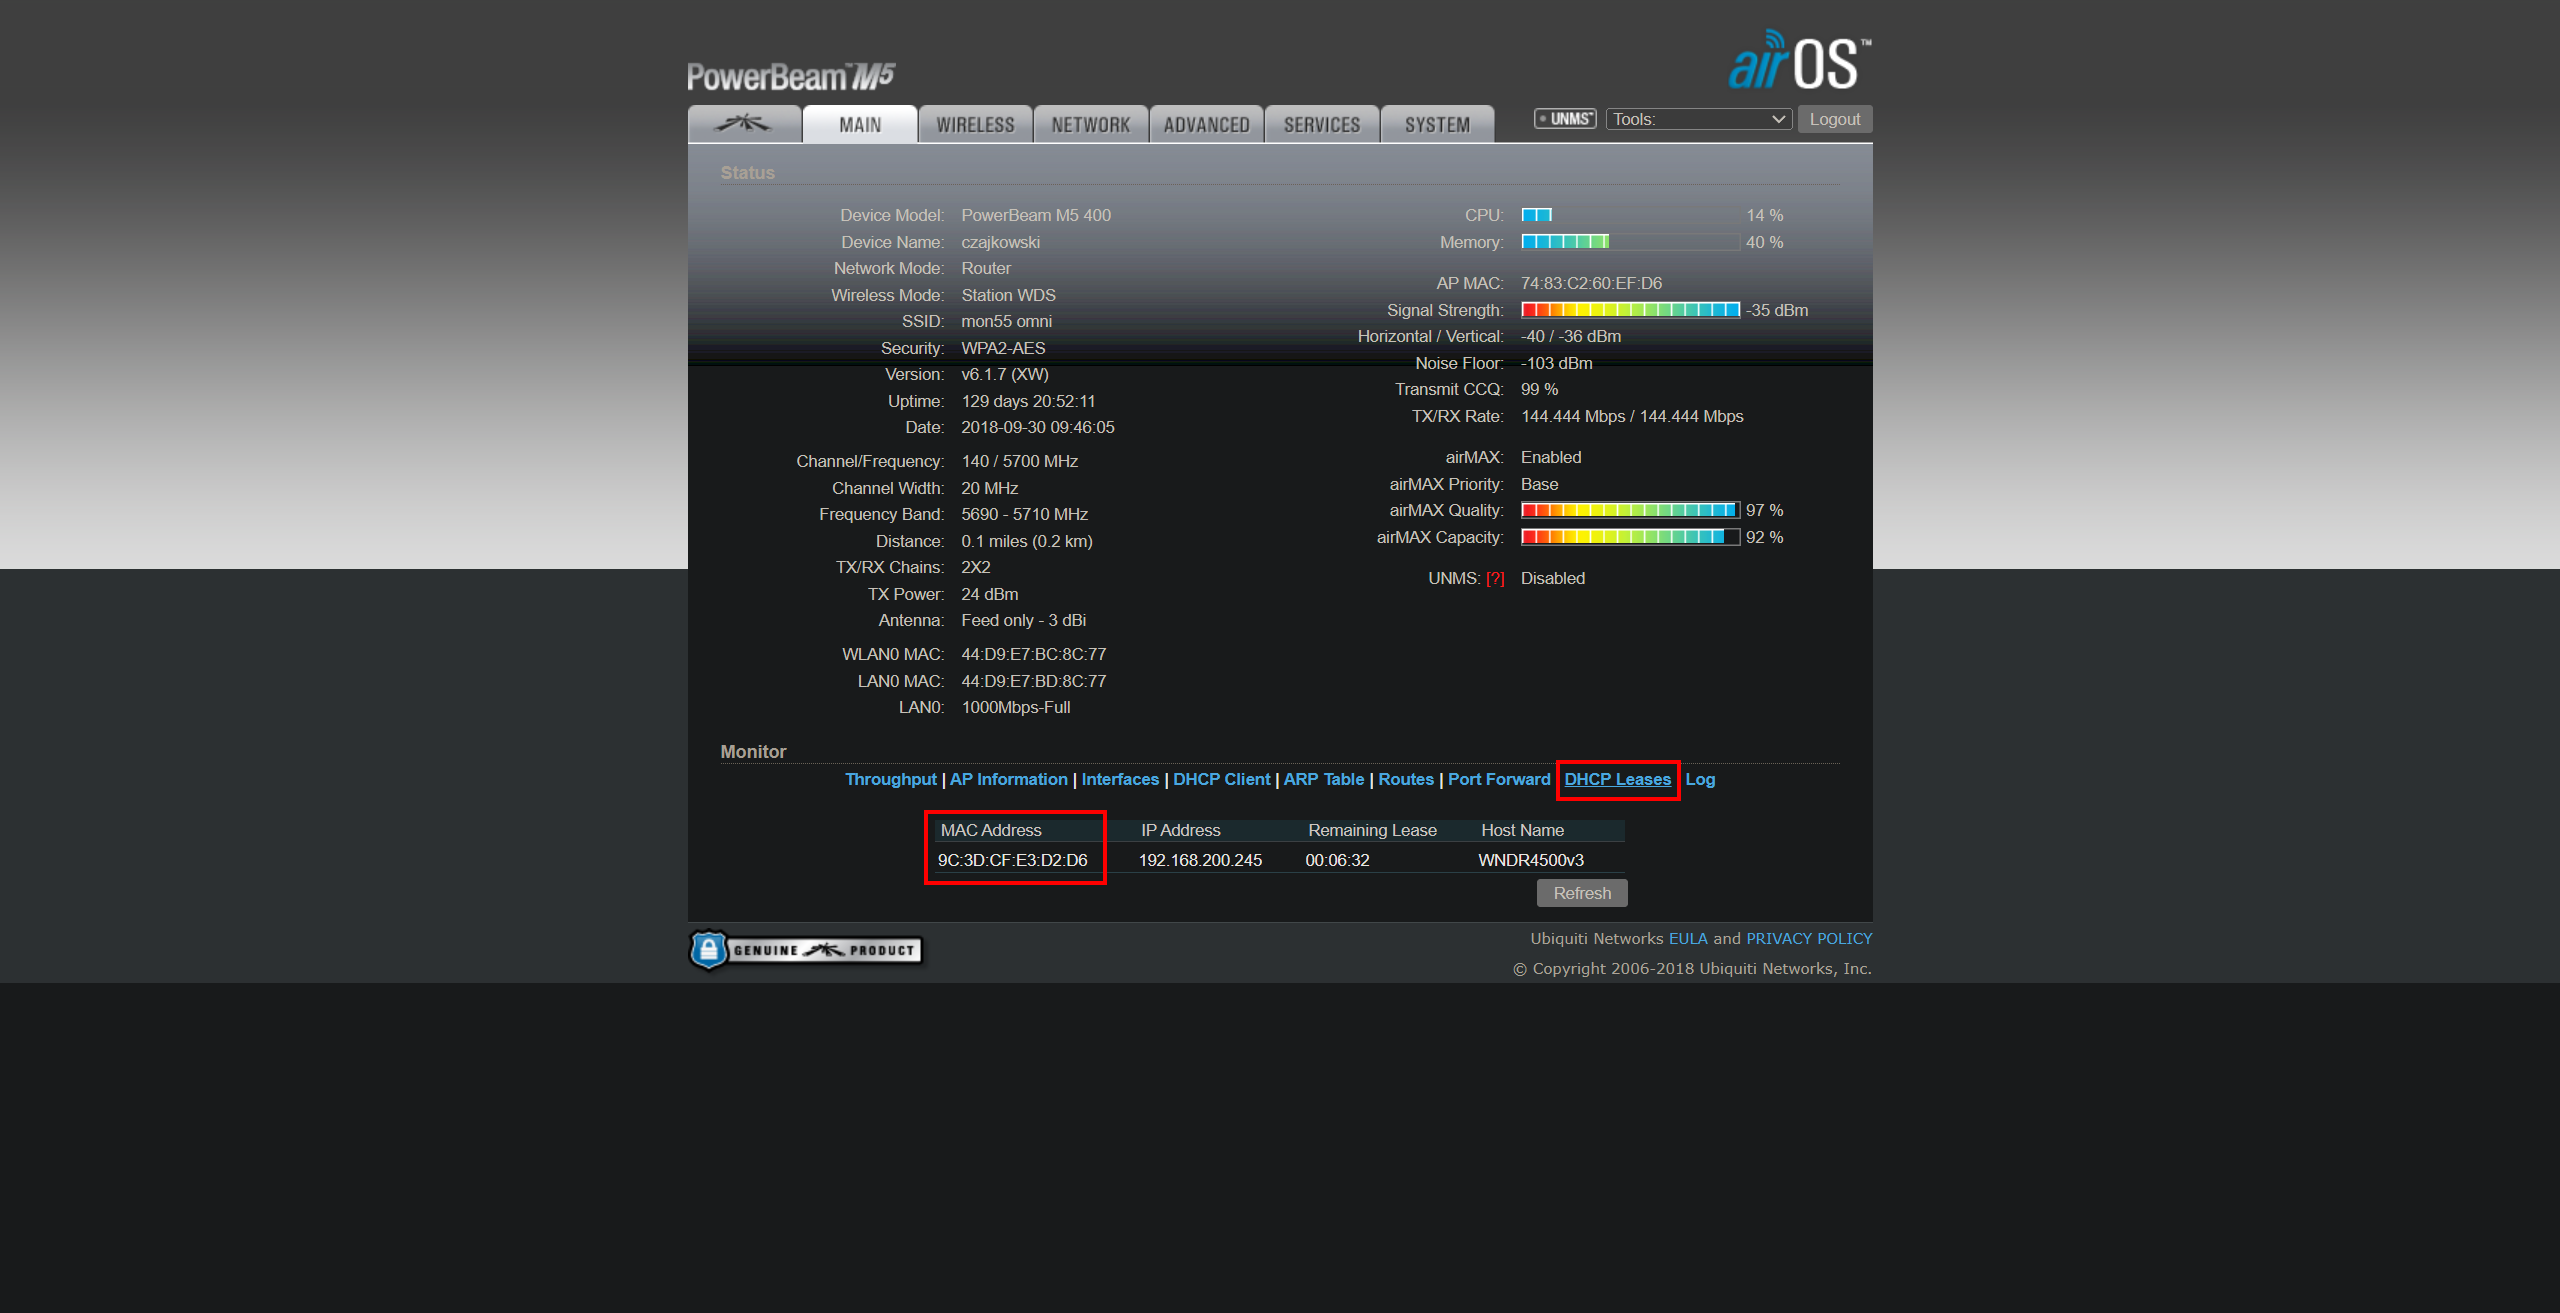
If the customer’s radio is in router mode you will find their MAC address under “DHCP Leases”.
Built-In Tools
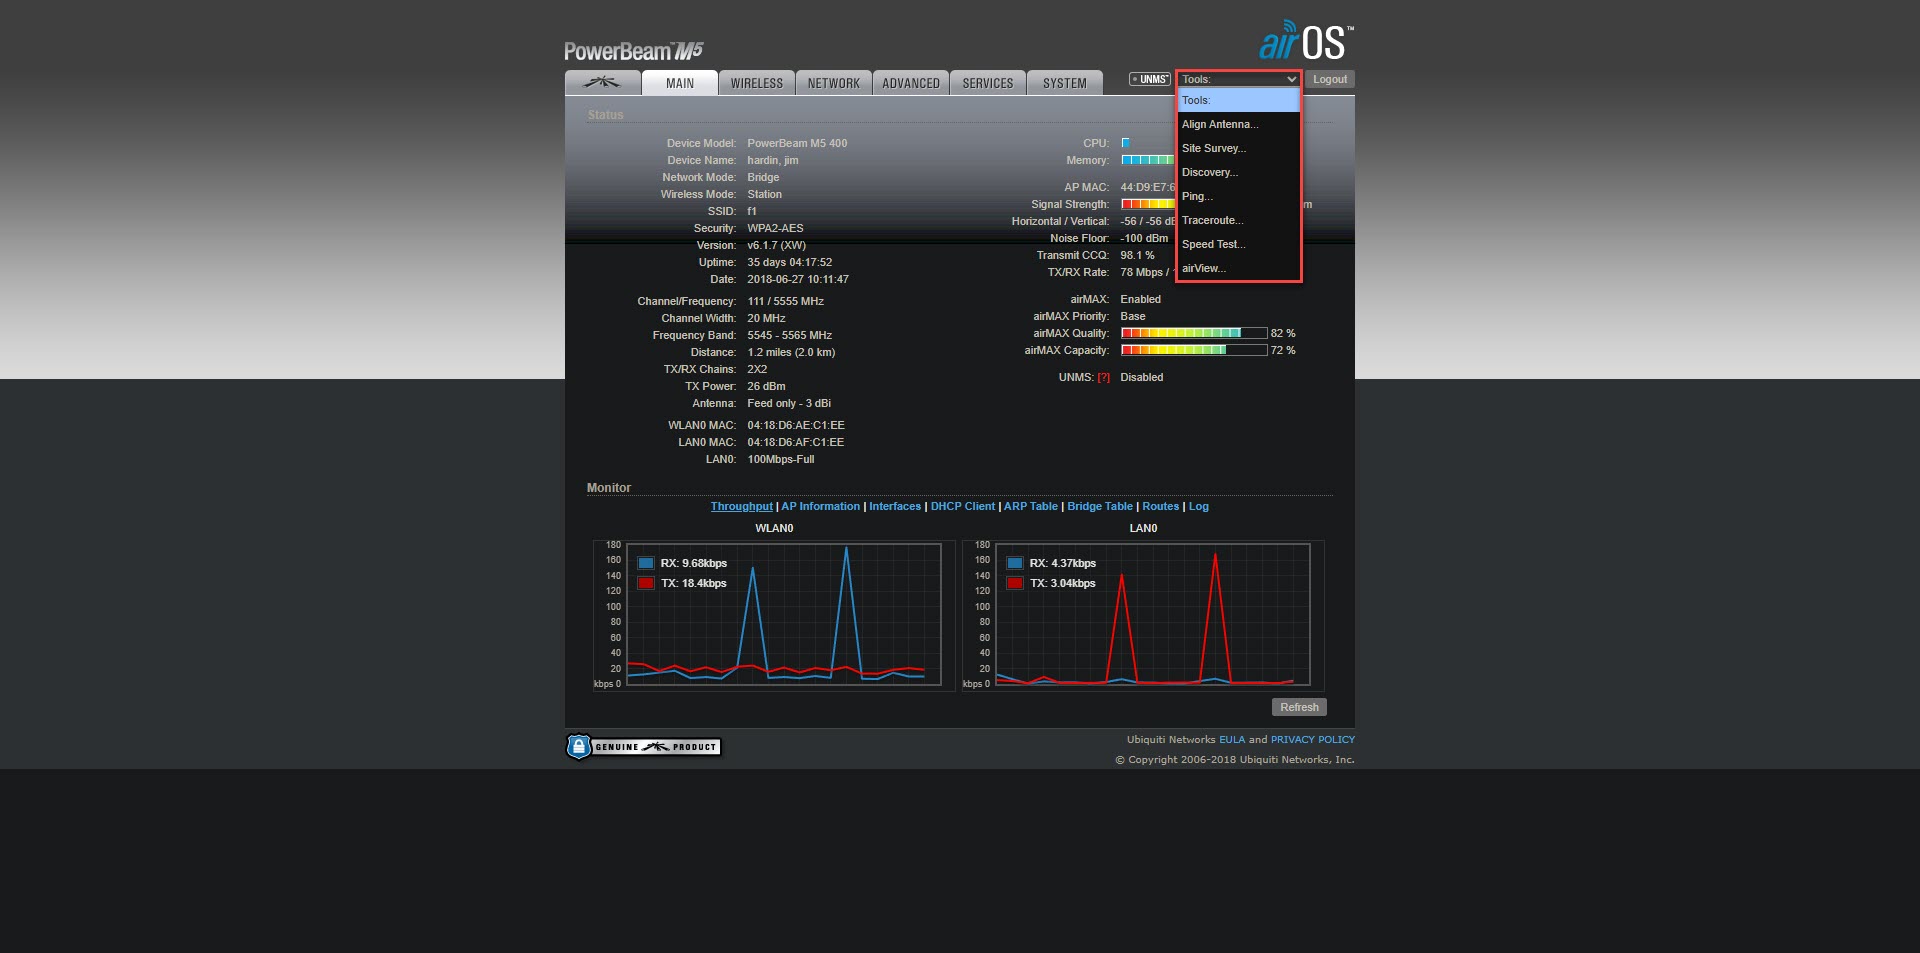
On the top right of the main splash page, you should see a “Tools” dropdown. This is the tools section. Here you can find tools such as the site survey, ping, and traceroute tools. The site survey tool is useful for checking for other devices that could be causing interference with their connection. The ping tool will allow you to test the latency between the CPE and AP which is also useful for checking for interference on their connection.
Site Survey Tool

This is an example of the site survey tool. Here you can look at the list for devices on the same or partially overlapping channel/frequency. You can sort the list by signal strength or frequency. This tool can also be used to check for other available APs. In this example, you can see that F1-30-90 is an alternative AP compared to what they’re connected to currently “F1” which is an omni.
Ping Tool
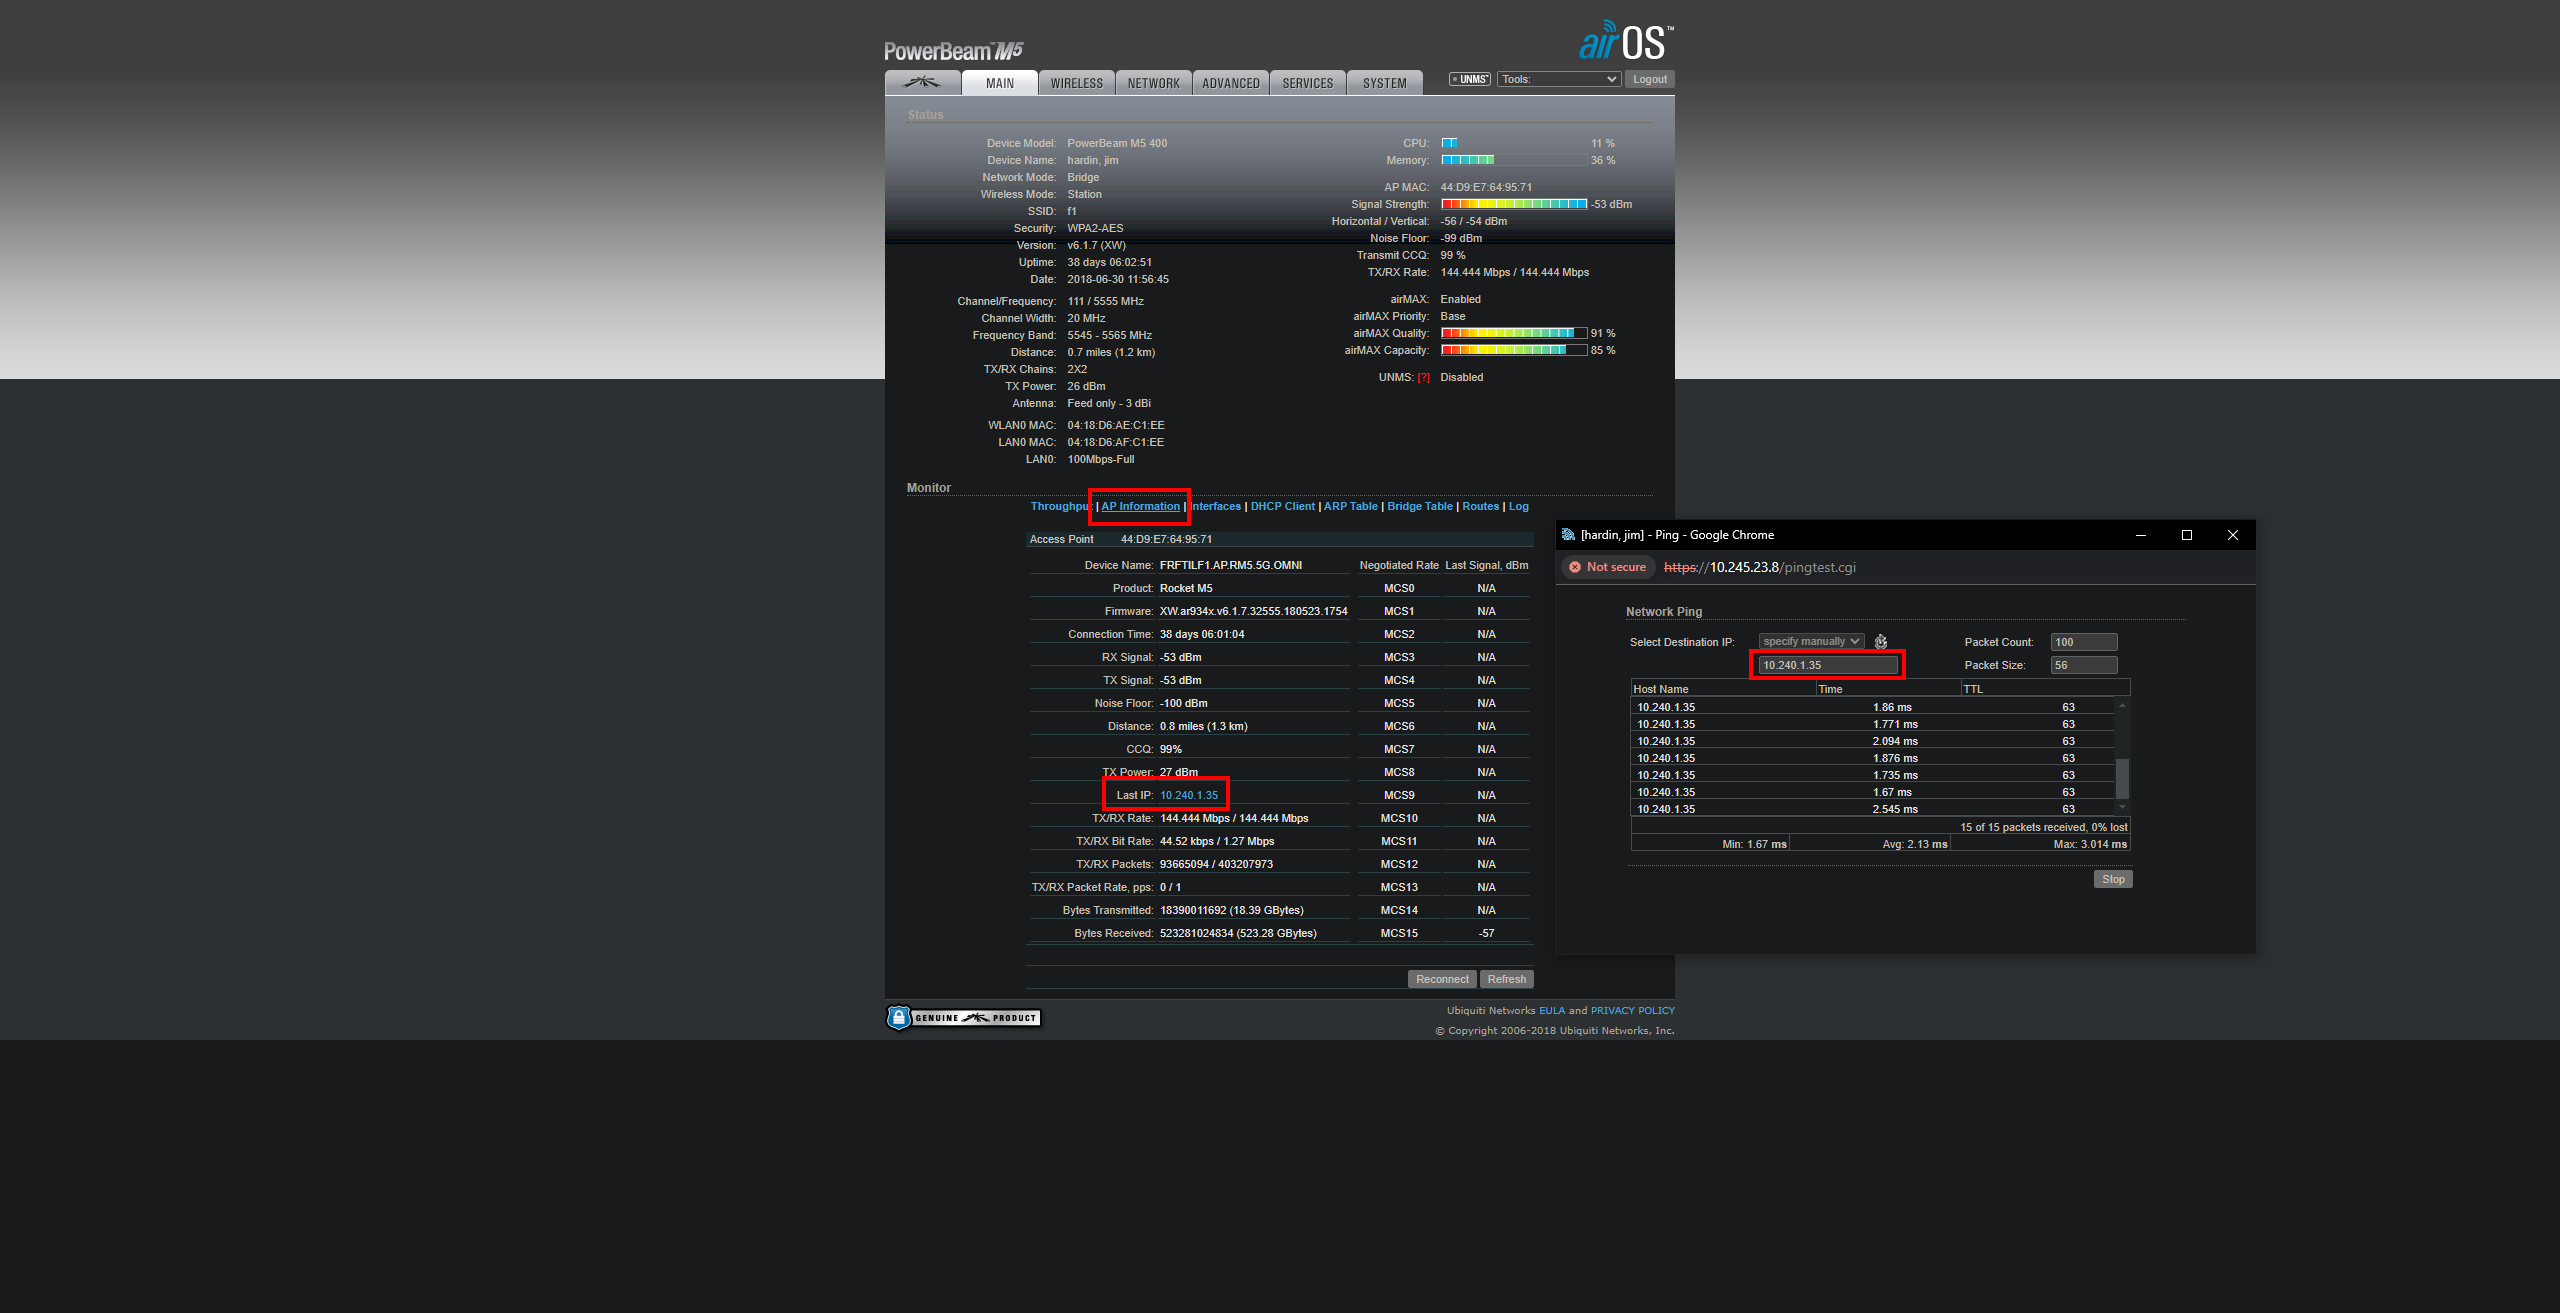
This is an example of the Ping Tool. To test the latency between the customer and the tower the first thing you are going to want to open is the “AP Information” tab. This page will provide you with information regarding the access point including its IP address. Once you have the AP’s IP you can open up the Ping Tool and start testing latency.
Changing AP
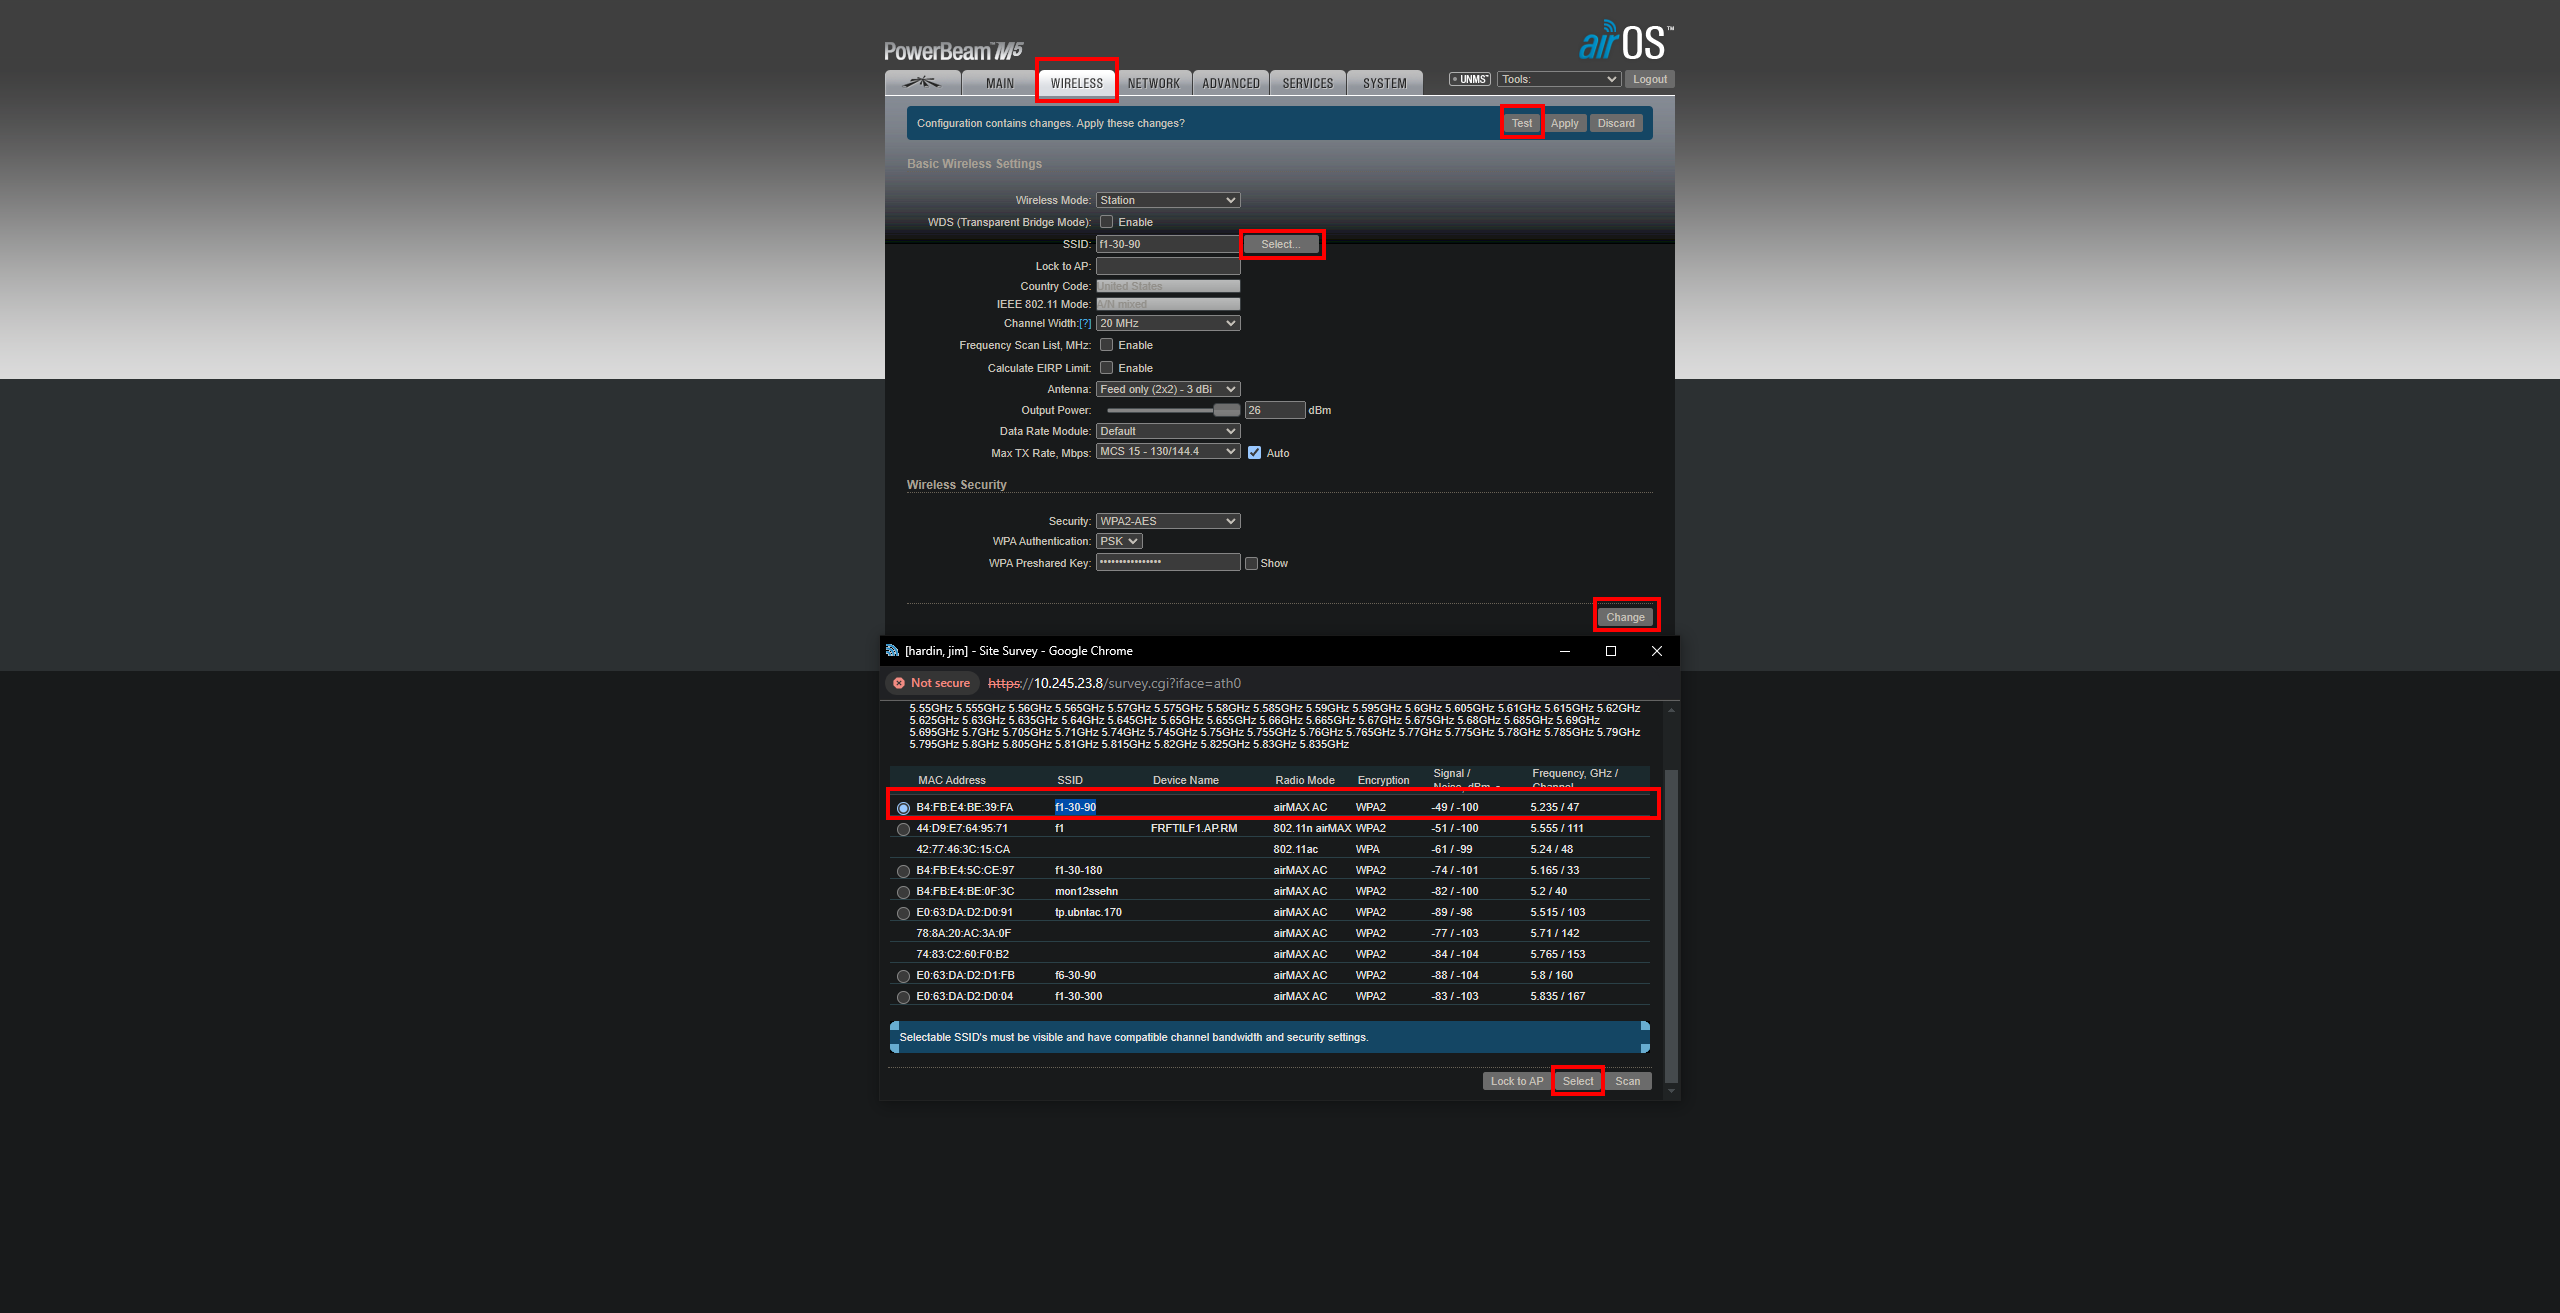
This is what the page would look like when scanning for a potential better AP for the customer. To navigate to this page you would click on the “Wireless” tab. Once on the page, you would click on “Select” and it will open up the site survey window. Once its scan is complete you want to sort by signal strength to see the best options available. After selecting a better option click “Select” at the bottom of the Site Survey Tool. Verify the new SSID has been inputted and proceed with clicking “Change” on the bottom right and then click “Test” to test the changes. Once the radio has reconnected verify the quality of the connection on the “Main” tab (Radio’s Splash page). After verifying the improvement to the connection navigate back to the “Wireless” tab and click “Apply” to save changes. Keep in mind that if the “Revised UNII Rules” are not activated they will not be able to see and connect to the whole 5Ghz spectrum.
Revised UNII Rules

To activate the revised UNNI rules you first want to navigate to the “System” tab. Under the “Miscellaneous” section you should see “Revised UNII Rules” with a button that says activate or deactivate. If the button says deactivate then the rules are already activated. To activate click “Activate” which will open the Activate/Deactivate window. Once here for the company name put “UBNT Unlock“ and for the key put “G3GNB-4BLWP-21WJ2-UU209”. Then proceed by clicking “Activate” to enable the revised rules.
Device Name / Remote Reboot
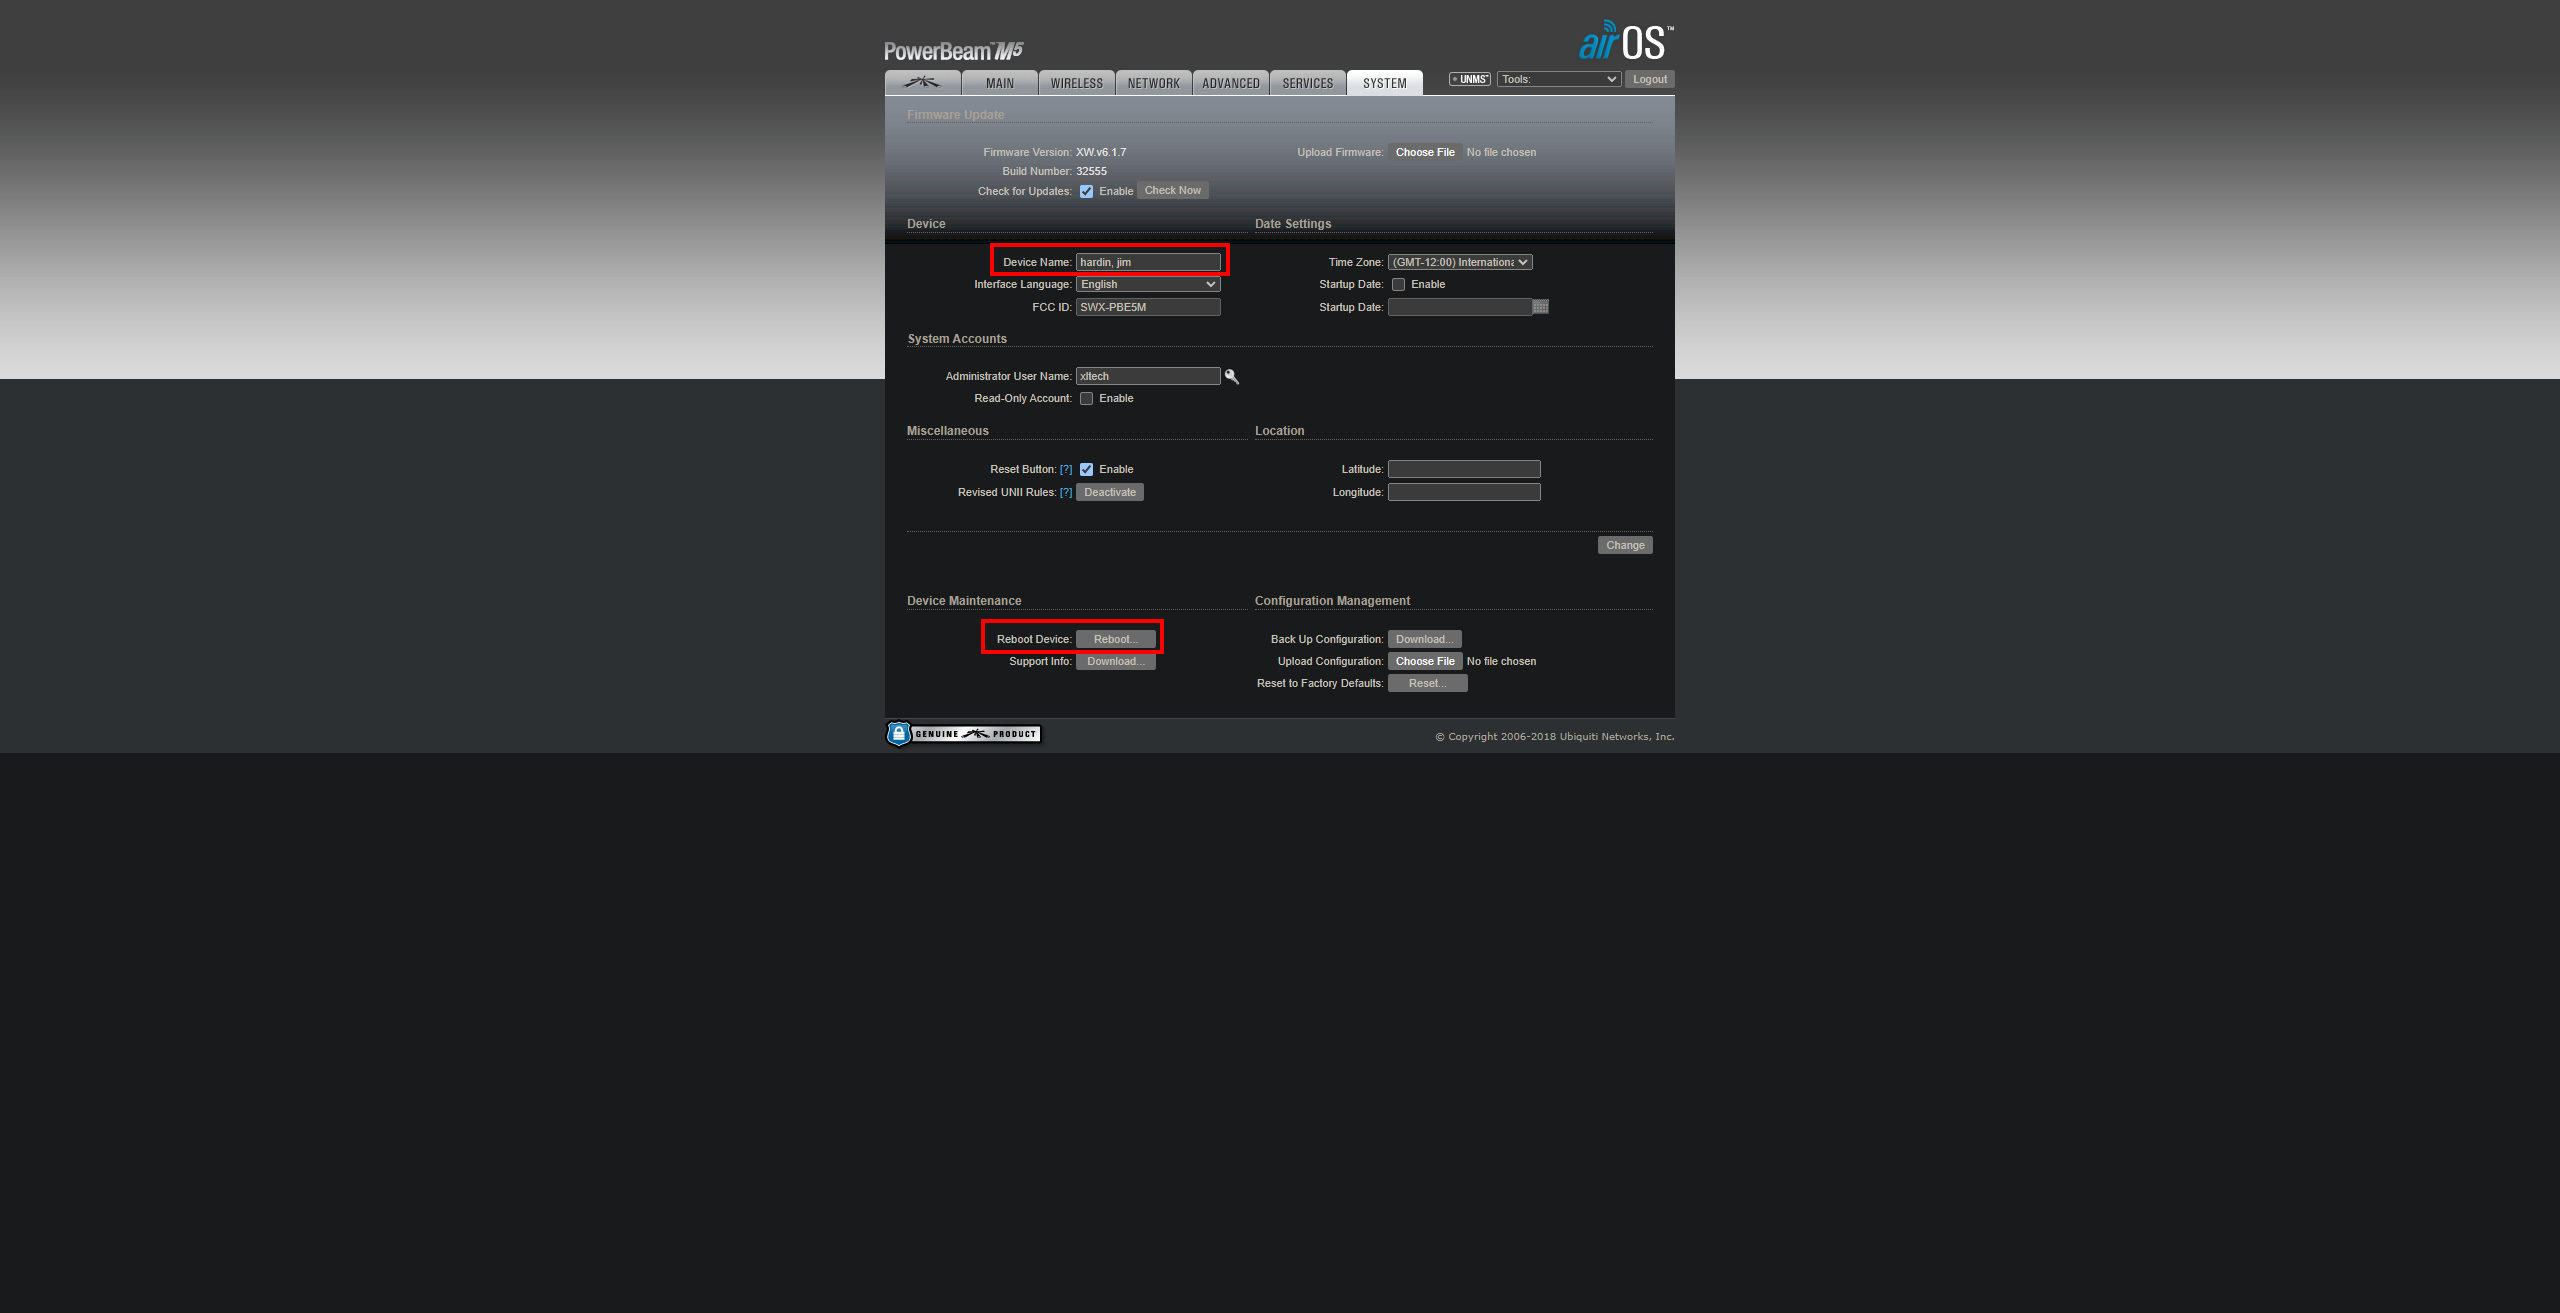
This is the system tab in the device settings. Here is where you would update the radio name on account takeover. This is also where you can reboot the radio if needed.
Bridged Settings

This is what the settings should look like in a radio that is in bridge mode. Always make sure the management address is set to DHCP.
NAT Settings

These are the correct settings for a radio that is in NAT mode.